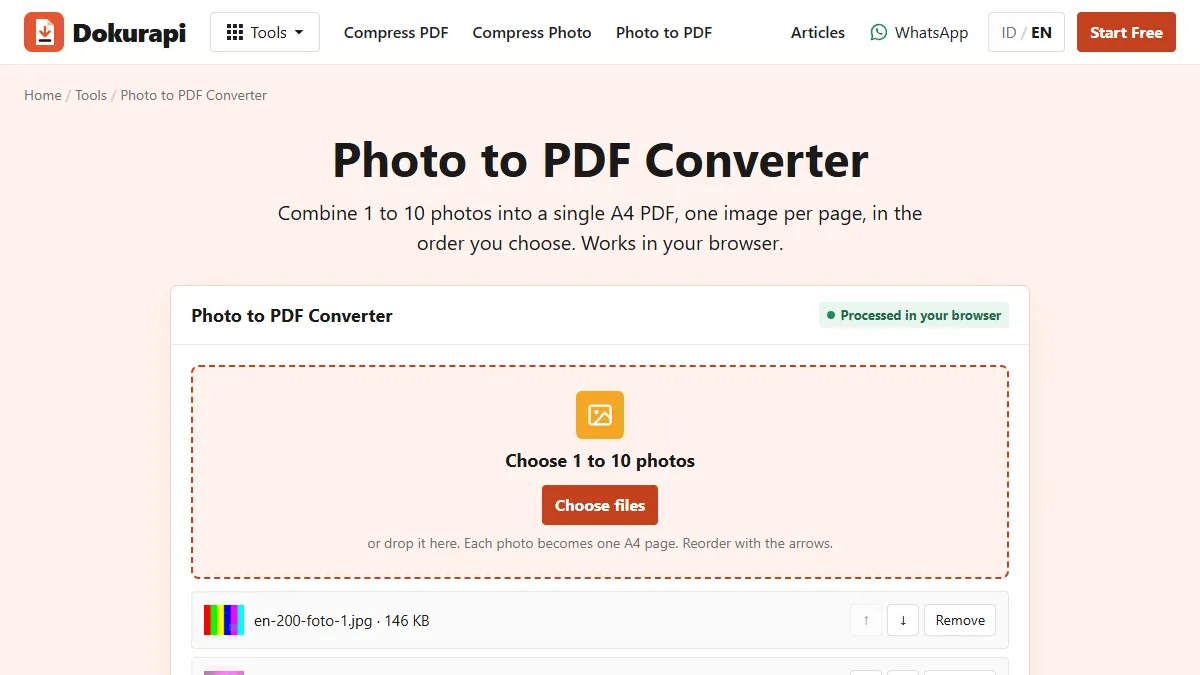
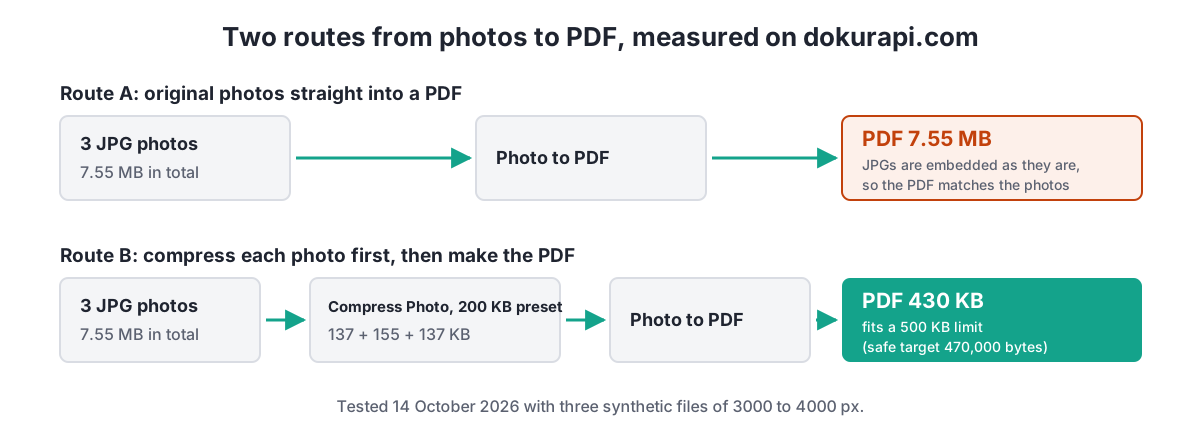
To compress JPG to PDF, shrink every photo first with the Compress Photo tool, then combine the smaller JPGs with Photo to PDF. The order matters because Dokurapi places each JPG into the PDF exactly as it is. In our test on 14 October 2026, three original photos totalling 7,551,447 bytes produced a 7,553,147-byte PDF. The same three photos compressed to the 200 KB preset first produced a PDF of 430,074 bytes, small enough for a 500 KB upload limit. Everything happens inside your browser tab.
This guide explains why the first route fails, how to work out a size budget for each photo before you start, and what to check before you upload. All numbers come from the live tools and from the code in assets/app.js, not from estimates.
Why a PDF of photos is as big as the photos
Many people expect "convert to PDF" to make files smaller. It usually does not. A PDF is a container. When you put a JPG inside it, the PDF stores the image data plus a little page information. Dokurapi's Photo to PDF tool uses the open source pdf-lib library and calls its JPG embedding function, which copies the JPG bytes into the PDF without re-encoding them. That keeps the photo sharp, but it also keeps every byte.
Our measurement shows how small the extra cost is. The three test photos were 3,471,789, 3,089,217 and 990,441 bytes, a total of 7,551,447 bytes. The PDF came out at 7,553,147 bytes, only 1,700 bytes more than the photos. That overhead covers three A4 pages and the PDF structure. In practice, the size of your PDF is the size of your photos.
PNG files behave the same way, only worse. Photo to PDF embeds a PNG as PNG, which is lossless and often several times larger than a JPG of the same picture. Other image types, such as WebP, are drawn onto a canvas, limited to 1,800 pixels on the longest side and saved as JPG at 90% quality before they go into the PDF. So the only reliable way to control the PDF size is to control the photos before you combine them.
Ready to try it? The tool is free and runs in your browser.
Open the Photo to PDF toolHow to compress JPG to PDF, step by step
The route that works is short. You compress first, combine second and check last.
- Count your photos and read the limit. Note how many pages the form expects and the maximum file size, for example three pages in one PDF of 500 KB.
- Work out the budget per photo with the table in the next section.
- Compress each photo in the Compress Photo tool. Choose the preset or type the custom target from the table, one photo at a time, and download each result.
- Open Photo to PDF and add the compressed JPGs, not the originals. Up to 10 photos fit in one PDF.
- Put the pages in order with the arrow buttons, then press Create PDF.
- Check the result in Check PDF Size before you upload.
If you want to understand what the Photo to PDF tool itself does with page size and order, the photo to PDF guide covers it in detail. This article stays on the size problem.
Work out a size budget for each photo
The budget is simple arithmetic. Dokurapi always aims 6% under the number you choose, so a 500 KB limit becomes a safe target of 470,000 bytes. NIST explains why: "KB" can mean 1,000 or 1,024 bytes depending on who counts, and the margin covers both. From the safe target, subtract about 2,000 bytes for the PDF structure, then divide by the number of photos.
When you type a custom target into the Compress Photo tool, the same 6% margin is applied to that number too. The table below already accounts for that, so you can type the value in the last columns directly.
| PDF limit | Safe target | 1 photo | 2 photos | 3 photos | 5 photos |
|---|---|---|---|---|---|
| 500 KB | 470,000 bytes | 500 KB preset | custom 248 KB | custom 165 KB | custom 99 KB |
| 1 MB | 940,000 bytes | 1 MB preset | custom 498 KB | custom 332 KB | custom 199 KB |
| 2 MB | 1,880,000 bytes | 2 MB preset | custom 998 KB | custom 665 KB | custom 399 KB |
Each custom value is the per-photo budget divided by 940, rounded down. For three photos in a 500 KB PDF the budget is (470,000 minus 2,000) divided by 3, which is 156,000 bytes, and 156,000 divided by 940 gives 165 KB. With a single photo the PDF overhead is small enough that the preset with the same number as the limit already fits.
You do not have to be exact. In our test we used the plain 200 KB preset for all three photos. The tool aims for 188,000 bytes per photo, which is above the 156,000-byte budget, but the results landed lower anyway, and the PDF still fit.
What the compression did to each photo
The Compress Photo tool starts at 84% JPG quality and limits the longest side to 2,400 pixels. If the file is still too big, it lowers the quality in steps of 10 points. Our first photo, a 4,000 by 3,000 pixel test image of 3.47 MB, was resized to 2,400 by 1,800 and saved at 54% quality, which gave 136,931 bytes. The second photo stopped one step earlier, at 64% and 154,892 bytes. The portrait-shaped third photo needed less work and stopped at 74% quality and 136,571 bytes.
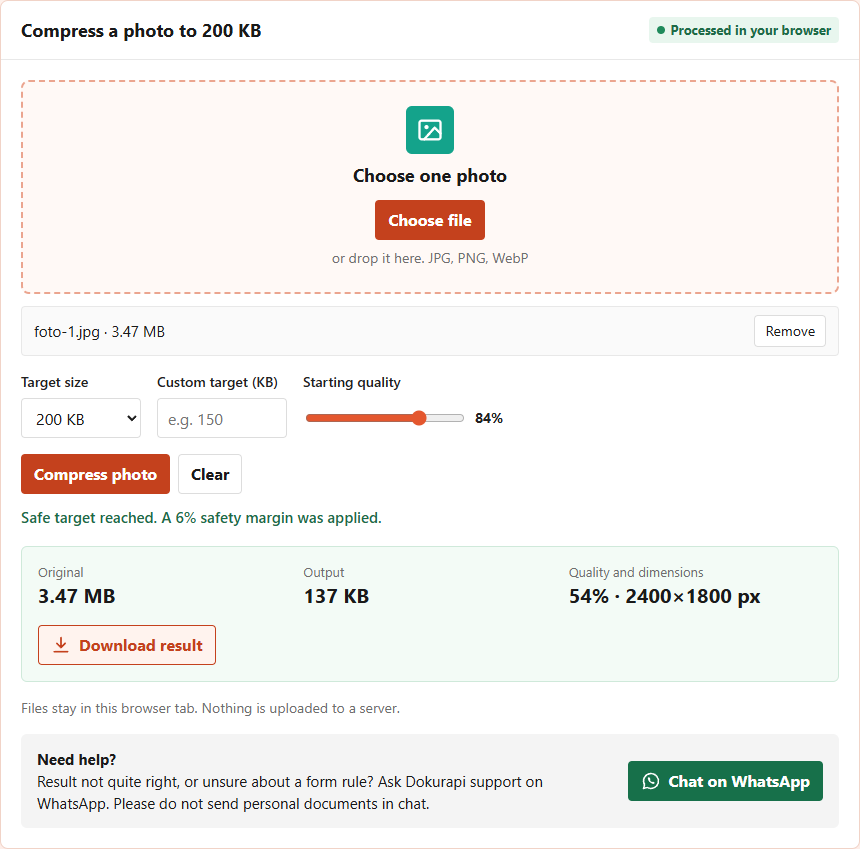
The quality steps explain why results often land well below the target. The tool stops at the first step that fits, so a photo that needs 60% quality is saved at 54%, the next step down. That leaves room in your budget, which is useful when one photo in the set is harder to compress than the others.
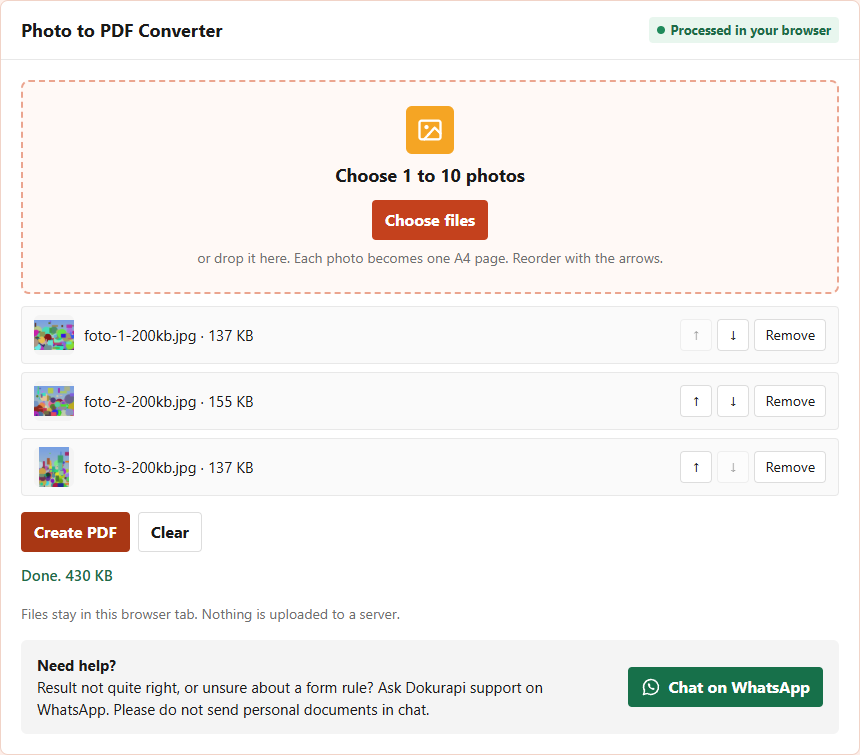
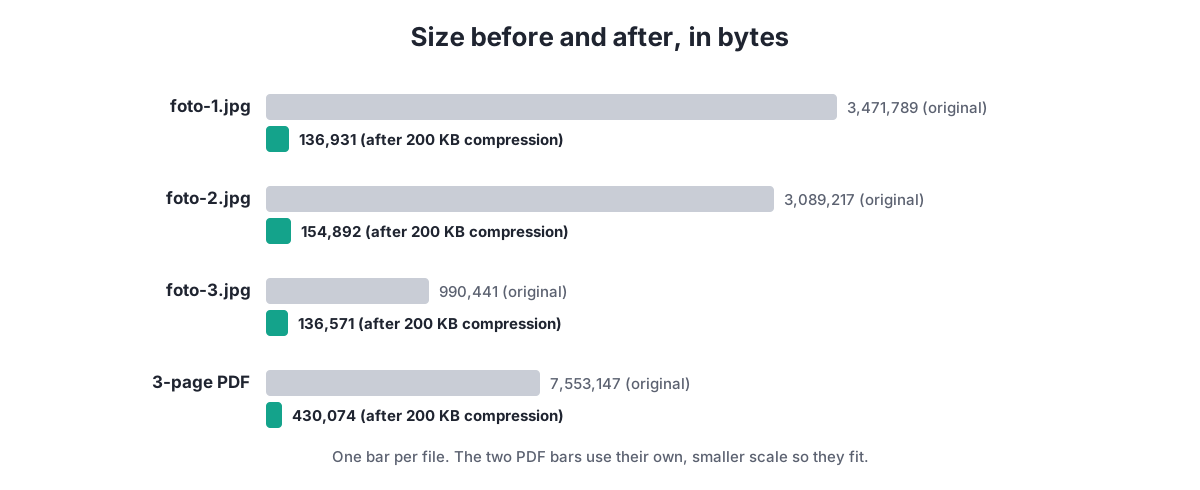
The three compressed photos added up to 428,394 bytes, and the PDF was 430,074 bytes, again about 1,700 bytes of overhead. That confirms the rule: add the sizes of your compressed photos, add 2 KB, and you know the PDF size before you make it.
Keep the pages readable
A smaller file is only useful if the person reviewing it can still read it. Before you combine the photos, open each compressed JPG and zoom to 100%. Check the smallest print you care about, such as a certificate number, a signature or a stamp. Blocky edges around letters mean the quality went too low for that page.
- Crop before you compress. Removing the table or floor around a document means every remaining pixel carries information.
- Shoot in good light. Shadows and grain add noise, and noise costs bytes.
- Start from the original camera file. A photo sent through a chat app has already been compressed once.
- Give hard pages more budget. If one page has dense small text, compress it to a higher custom target and the simple pages to a lower one, as long as the total stays inside the safe target.
For tight per-file limits, the compress photo to 200 KB guide shows how far quality can drop before text suffers. The same judgement applies to each page of your PDF.
Page order, page size and the 10-photo limit
Photo to PDF puts one photo on each A4 page, scaled to fit and centred, in the order of the list. Use the arrow buttons to move a photo up or down before you press Create PDF. The tool accepts up to 10 photos per PDF and tells you how many were left out if you add more.
If you need more than 10 pages, make two PDFs and join them with Merge PDF. Merging copies the pages as they are, so the merged file is roughly the sum of the two parts. The merge PDF guide explains naming and order for multi-part submissions, and the page order checklist helps you catch a swapped page before a reviewer does.
Because every page is A4, a landscape photo is placed across the width with white space above and below. That white space costs almost nothing in bytes. Only the photo data counts.
If the PDF is still too big
If the PDF still exceeds the limit, go back one step instead of compressing the PDF itself. Compress the largest photo again with a lower custom target, or compress all of them to the next budget down, then rebuild the PDF. You keep control of each page this way.
Compressing the finished PDF with Compress PDF also works, because Dokurapi renders every page again as a JPG at a fixed resolution. For a photo PDF this usually shrinks the file a lot, but it also lowers the resolution of every page to about 86 dots per inch at most. That is fine for a photo of an ID card and risky for a page of small print. The guide on files that are still too big walks through the other causes, and how to check file size before upload shows how to read the exact byte count the form will see.
None of these steps sends your photos anywhere. The explanation of how the browser tools work describes what stays on your device.
Frequently asked questions
How do I compress JPG to PDF?
Does converting JPG to PDF make the file smaller?
How big should each photo be for a 500 KB PDF?
Why is my PDF bigger when I use PNG files?
How many photos can go into one PDF?
Can I compress the PDF after making it instead?
Are my photos uploaded to a server?
Why did my photo come out smaller than the target?
Sources
- pdf-lib: PDFDocument.embedJpg and embedPng
- NIST: Prefixes for binary multiples
- MDN: HTMLCanvasElement.toBlob() and the quality parameter
Need help?Result not quite right, or unsure about a form rule? Ask Dokurapi support on WhatsApp. Please do not send personal documents in chat.
Chat on WhatsApp