To convert WebP to JPG, open the image in a converter that decodes WebP and saves a JPEG copy, then check the new file size before you upload it. Dokurapi's Compress Image tool does this in your browser: drop in a .webp file, choose a size target such as 200 KB or 1 MB, and download a .jpg. Nothing is uploaded to a server, so the picture stays on your device.
This guide explains why so many images arrive as WebP, what a JPG copy keeps and loses, why the JPG can end up bigger than the WebP, and which settings to pick for an upload form with a KB limit. Every number about the tool below comes from its own code and from test runs with synthetic sample files, not from guesses.
Why your image is a WebP and why forms reject it
WebP is an image format created by Google for the web. Its selling point is size: Google's WebP documentation states that lossy WebP images are 25 to 34% smaller than comparable JPEG images at equivalent quality, and lossless WebP images are 26% smaller than PNGs. Smaller images load faster, so many websites, content networks and messaging apps now serve WebP by default. When you right-click a picture in a browser and save it, you often get a .webp file even though the page looked like an ordinary photo.
The trouble starts when that file has to go somewhere else. Plenty of upload forms only accept the formats listed in their rules. The official SNBP 2026 registration guide, for example, lists PDF, PNG and JPG for achievement evidence, with a 2 MB maximum per file, and WebP is not on that list. Older desktop software, some print shops and some office tools behave the same way. A form that checks the file extension will refuse a .webp even when the picture itself is fine.
Renaming the file from .webp to .jpg does not fix this. The bytes inside are still WebP, so a strict validator, an image library or a printer driver can still reject or misread it. A real conversion decodes the WebP pixels and writes a new JPEG file, which is what the steps below do. If you also need to check the file size before upload, do it after converting, because the size changes.
Ready to try it? The tool is free and runs in your browser.
Open the Compress Image toolWebP vs JPG: what changes when you convert
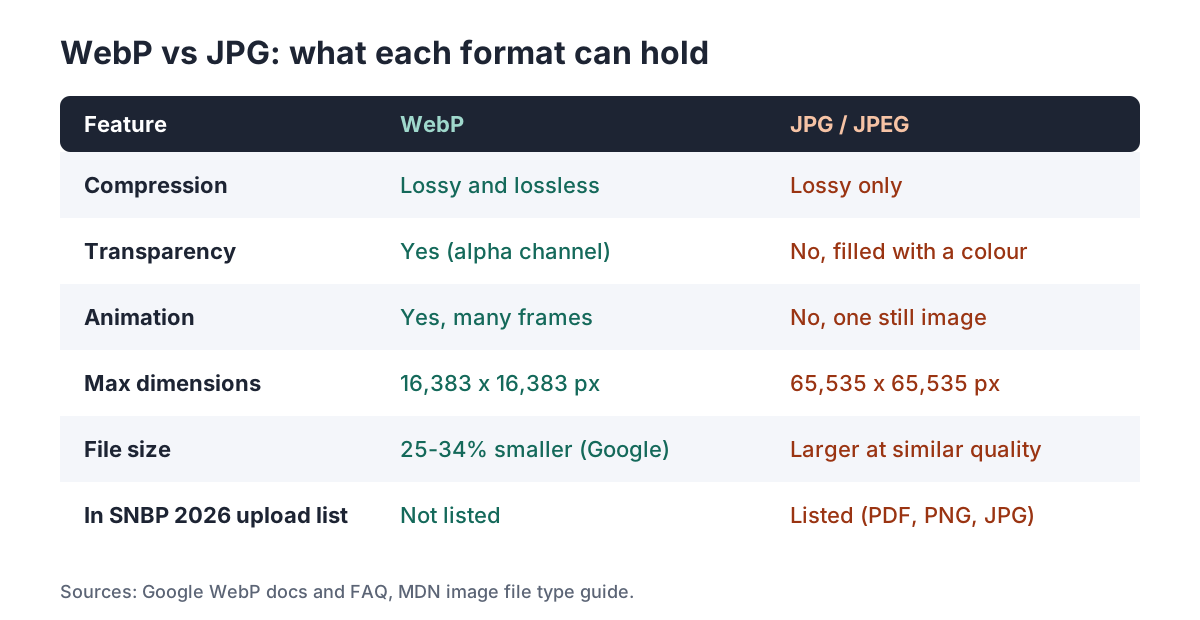
JPG (also written JPEG) is the older and more widely accepted format. It handles photos well, but it stores less than WebP can. MDN's image format guide notes that JPEG does not support an alpha channel, so it cannot keep transparency, and a JPEG holds a single still image. WebP can be lossy or lossless, can carry transparency, and can contain an animation with many frames.
| Feature | WebP | JPG / JPEG |
|---|---|---|
| Compression | Lossy and lossless | Lossy only |
| Transparent background | Yes (alpha channel) | No, transparent areas must be filled with a colour |
| Animation | Yes, multiple frames | No, one still image |
| Maximum dimensions | 16,383 x 16,383 pixels | 65,535 x 65,535 pixels |
| Typical size at similar quality | 25 to 34% smaller than JPEG (Google, lossy) | Larger |
| Browser support | Current Chrome, Edge, Firefox, Opera and Safari (Safari 14 or later) | All browsers |
For a normal photo, the conversion is close to invisible: colours, faces and text in the picture survive, and you get a file that nearly every portal, editor and phone gallery opens. What you give up are the extras. A transparent logo gains a solid background, an animated sticker becomes a single frame, and the file size may go up rather than down.
How to convert WebP to JPG with Dokurapi
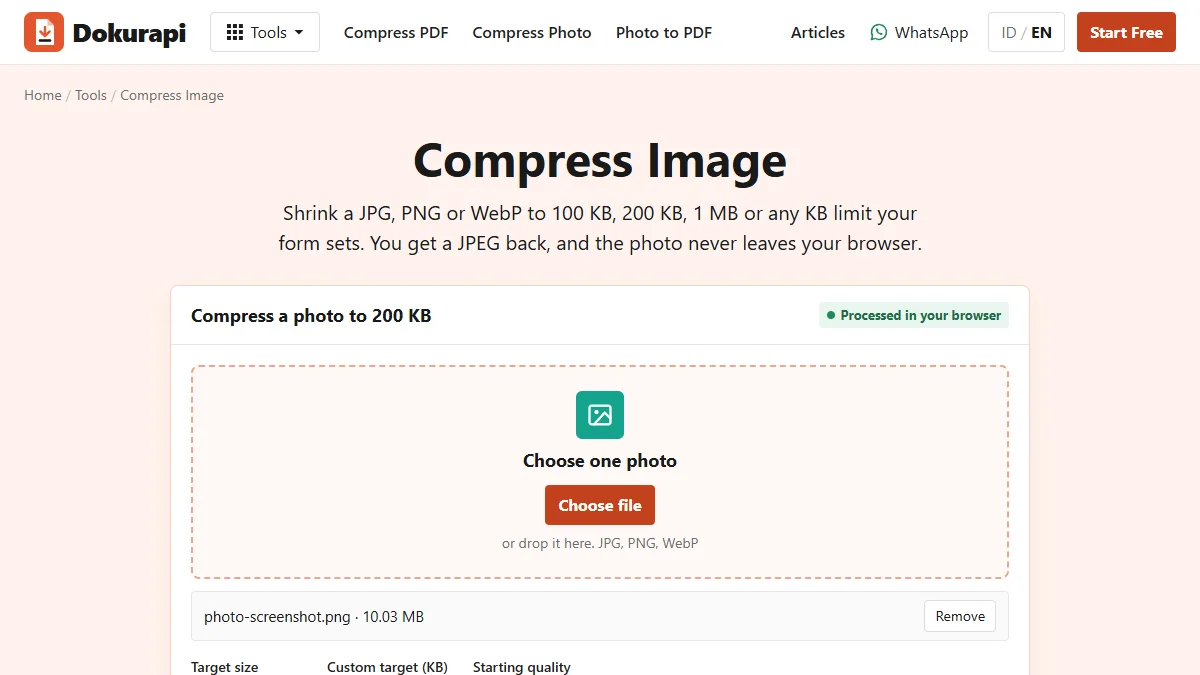
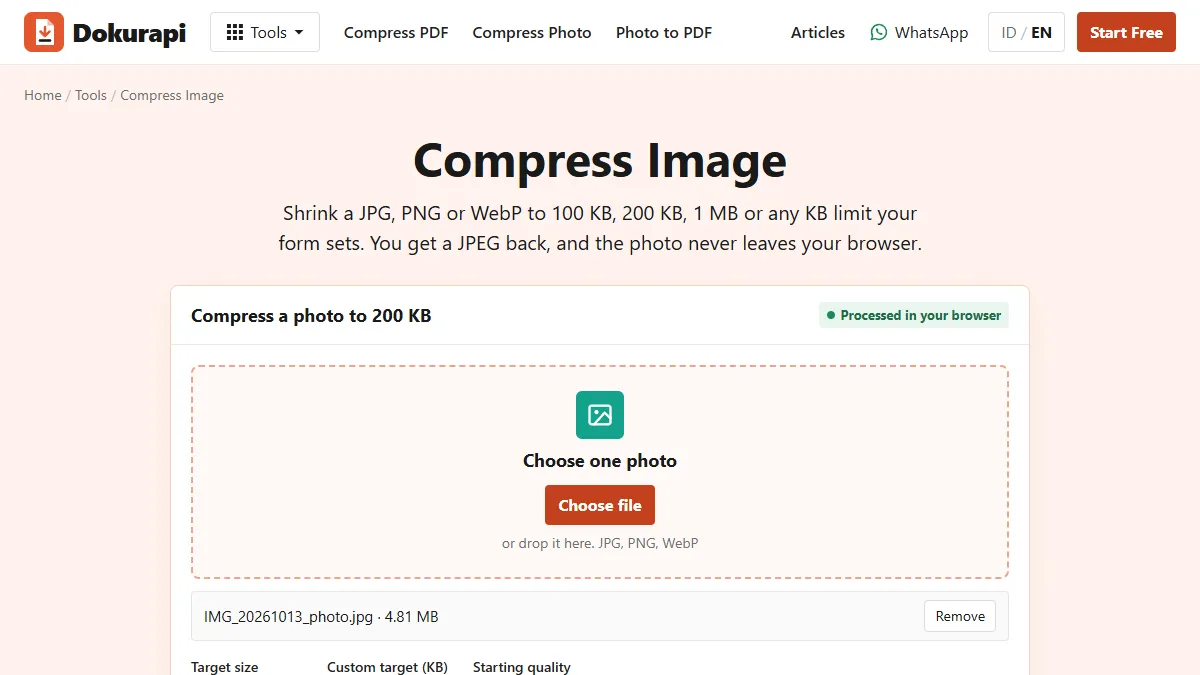
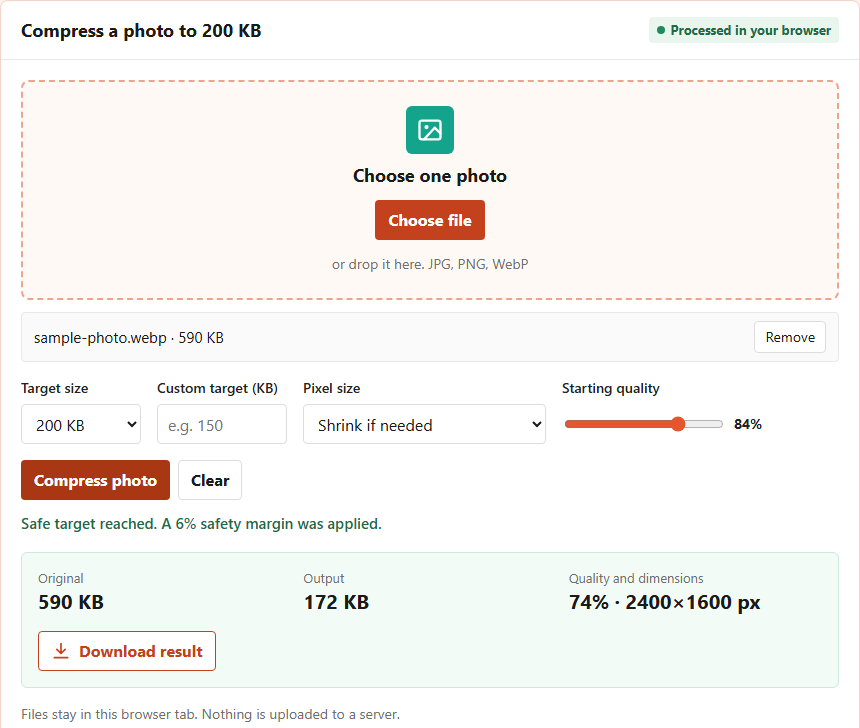
The Compress Image tool accepts JPG, PNG and WebP and always gives back a JPEG, so it doubles as a WebP to JPG converter. Everything happens inside the browser tab: the image is drawn onto a canvas and encoded as JPEG on your own device.
- Open Compress Image on a phone or computer.
- Tap Choose file or drop your .webp file onto the box. The tool takes one image at a time.
- Pick a Target size. Use the limit from your form (100 KB, 200 KB, 500 KB, 1 MB or 2 MB), or type any number in Custom target (KB). If there is no limit, choose 1 MB or 2 MB.
- Choose Pixel size. Shrink if needed caps the longest side at 2,400 pixels and may go smaller to reach the target. Keep original size leaves the pixel dimensions untouched and only lowers JPEG quality.
- Leave Starting quality at 84% unless you have a reason to change it, then press Compress photo.
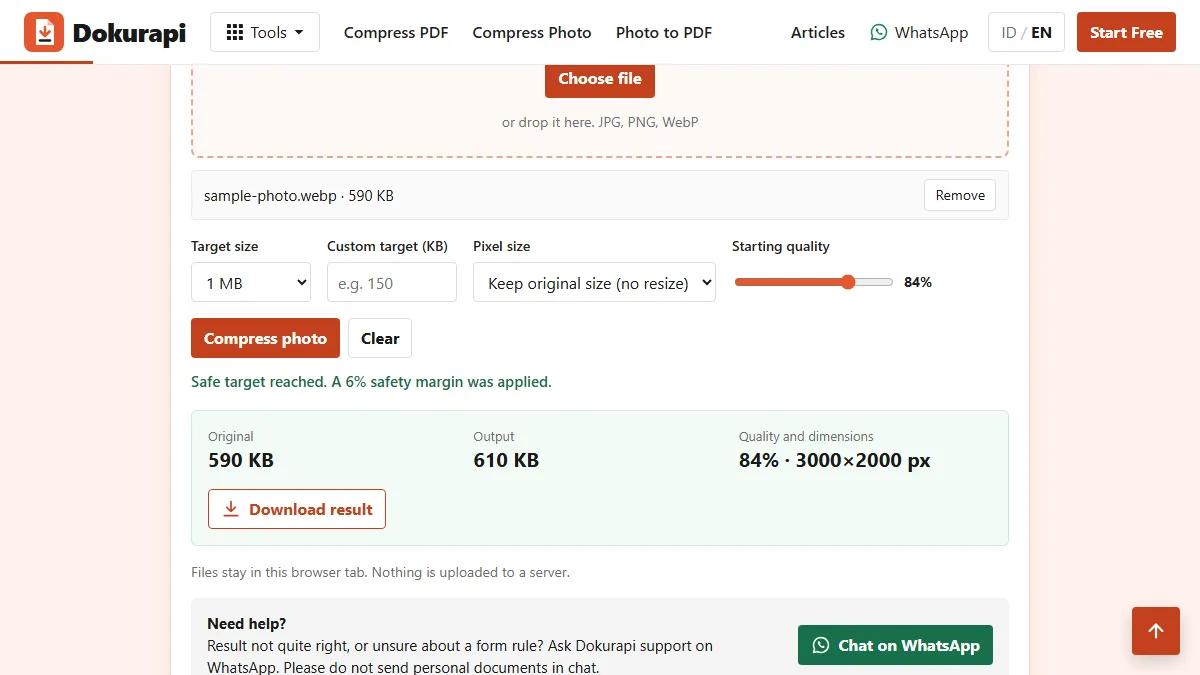
- Read the result line, which shows the original size, the output size, the final quality and the pixel dimensions, then press Download result. The file is saved with the original name plus
-dokurapi.jpg.
If the result says the target was not reached, the image needed more than the tool's minimum quality allows. Try Shrink if needed, or read what to do when a compressed file is still too big.
Will the JPG be bigger or smaller than the WebP?
Many people expect a converted file to shrink. Often it grows. Because WebP compresses more efficiently, a JPG at similar visual quality usually needs more bytes. We tested this with a synthetic 3,000 x 2,000 pixel WebP of 590,442 bytes. With a 1 MB target and Keep original size, the JPG came out at 610,216 bytes at 84% quality, slightly larger than the source. With a 200 KB target and Shrink if needed, the same image became 172,319 bytes at 74% quality and 2,400 x 1,600 pixels.
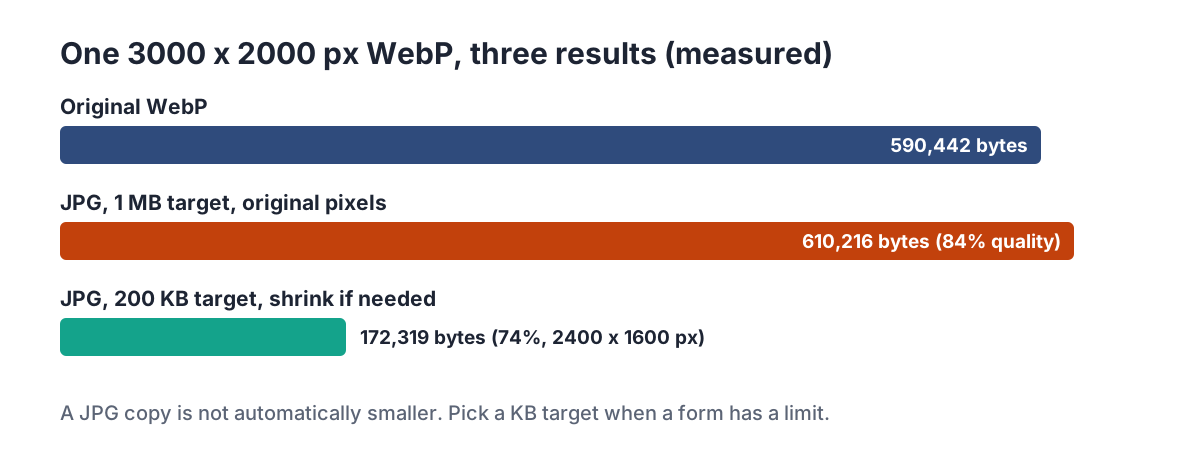
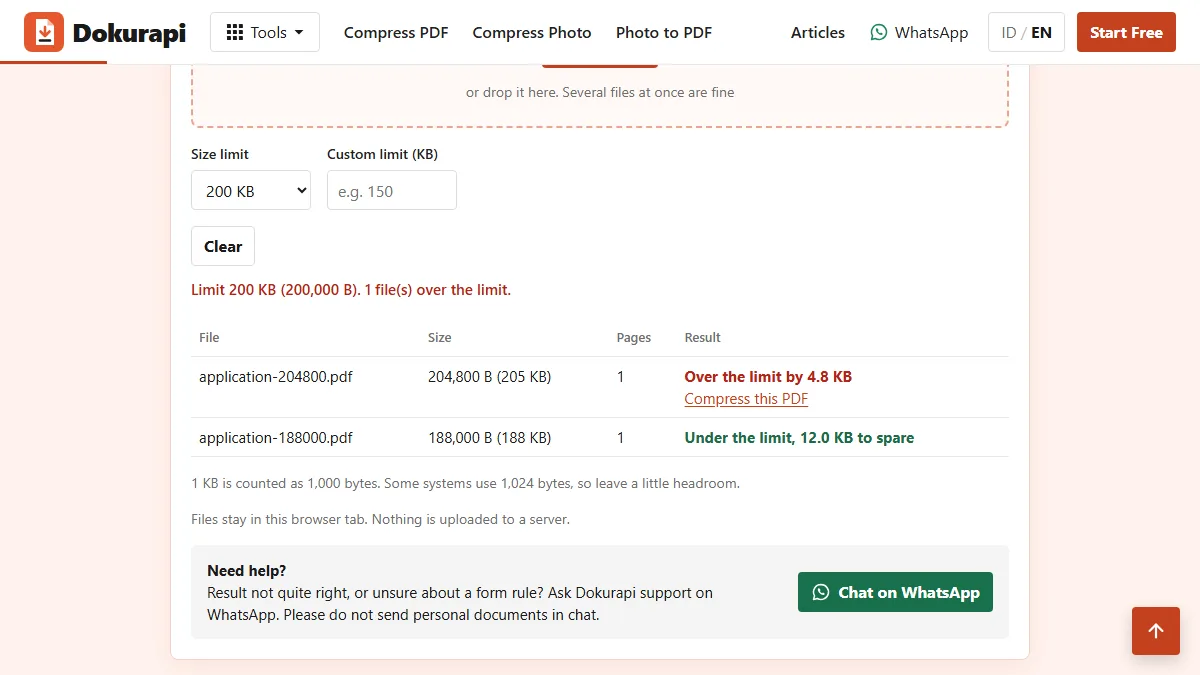
The lesson is simple: when a form sets a limit, convert and compress in one pass by choosing that limit as the target. The tool aims below it on purpose. It counts 1 KB as 1,000 bytes and applies a 6% safety margin, so a 200 KB target means the output must be at most 188,000 bytes. That margin covers portals that count 1 KB as 1,024 bytes, a difference explained in 200 KB to MB.
When quality alone is not enough, the tool lowers quality in 10-point steps (never below 18%) and, in Shrink if needed mode, then reduces the pixel dimensions, stopping at 640 pixels on the longest side. For very small limits, see compressing an image to 50 KB or the 100 KB image tool.
Transparent and animated WebP files
Two kinds of WebP need extra care. The first is an image with a transparent background, such as a logo, an icon or a cut-out product photo. JPEG has no alpha channel, so every transparent pixel has to become some colour. Dokurapi paints the canvas white before drawing the image, which means transparent areas turn white in the JPG. On a white document that looks fine. On a coloured slide or a dark website it shows up as a white box around the logo.
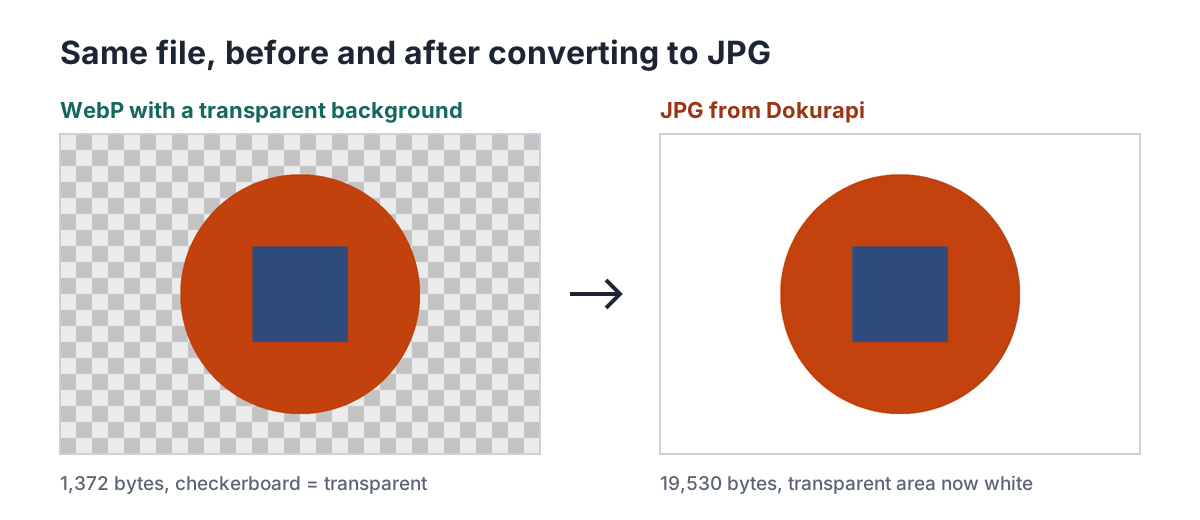
Notice the size too. That simple lossless WebP logo was 1,372 bytes; the JPG was 19,530 bytes, about 14 times larger, because JPEG is built for photos and handles flat shapes and sharp edges less efficiently. If you need to keep transparency, convert to PNG with another app instead, or keep the WebP if the destination accepts it. Our guide to compressing PNG files covers that side.
The second case is an animated WebP, such as a sticker or a short loop. A JPEG cannot hold more than one frame, so any conversion to JPG gives you a single still picture. If the motion matters, JPG is the wrong target format.
Which settings to pick for each situation
The right target depends on where the file goes next. Use the table as a starting point, and always follow the exact numbers printed in your form's own rules, because limits change from year to year.
| Situation | Target size | Pixel size | Why |
|---|---|---|---|
| Form with a 200 KB limit | 200 KB | Shrink if needed | Lets the tool trade a few pixels for a file that passes |
| Form with a 100 KB limit | 100 KB | Shrink if needed | Small limits usually need fewer pixels as well as lower quality |
| Form with a 2 MB limit, such as SNBP 2026 achievement evidence | 2 MB | Keep original size | Plenty of room, so keep full detail |
| Printing or editing later | 2 MB or a custom higher number | Keep original size | Avoids losing pixels you may need |
| Sending in chat or email, no limit | 1 MB | Shrink if needed | 2,400 pixels on the long side is ample for screens |
| Logo with transparent background | Do not convert to JPG | Not applicable | JPG fills transparency with white |
Need the photo inside a PDF instead? Convert it to JPG first, then use Photo to PDF, or read how to combine several images into one PDF. For ID photos with a red or blue background, the passport photo tool also outputs JPG.
When you should not convert WebP to JPG
Converting is a fix for compatibility, not an upgrade. If the place you are sending the image already accepts WebP, keep it: you avoid a second round of lossy compression and you keep the smaller file. Every lossy save throws away a little detail, so turning a lossy WebP into a JPG means the picture has been compressed twice.
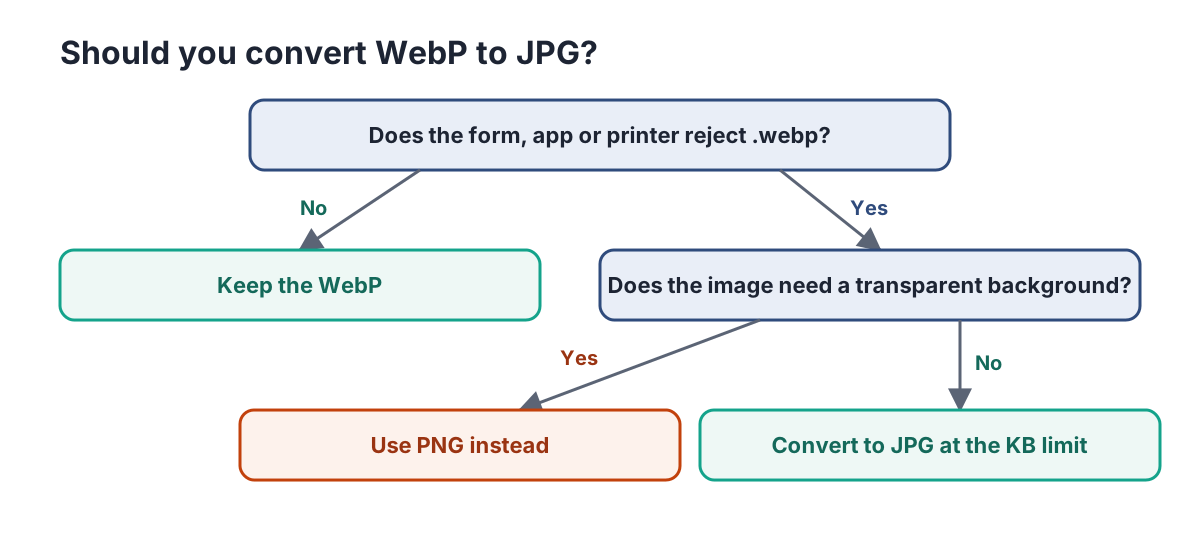
Also skip JPG for images where transparency or animation is the point, as described above. Screenshots full of small text can look soft as JPG at low quality; if a form allows PNG and has a generous limit, PNG may be the cleaner choice. For everything else (photos of documents, pas foto, selfies, product pictures) JPG is the safe and widely accepted option. If you want to understand how the browser handles your files, see how browser-only tools work.
Other ways to change WebP to JPG
A browser tool is the quickest route on a borrowed computer or a phone, but it is not the only one. Most image editors that can open WebP files can also export a JPEG through Save as or Export, with JPEG chosen as the format. The catch is that you then have to check the size yourself and, if it is over the limit, compress it again in a second step.
Some online converters upload your image to their servers. That is fine for a meme, but think twice for an ID card, a certificate or a photo of a child, since you cannot see what happens to the file after upload. Dokurapi's tool processes the image in the open tab, which you can confirm by disconnecting from the internet after the page loads and running the conversion anyway.
On phones, a common trick is to take a screenshot of the WebP and use the screenshot instead. It works, but it captures the screen resolution, adds whatever is around the picture and usually saves as PNG, so you still need a crop and a conversion. Converting the original file directly keeps the full image and gets you a proper JPG in one step. Afterwards, the size checker confirms the exact byte count if your portal is strict.
Checklist before you upload the JPG
Before you submit, spend half a minute on these checks. They catch the problems that most often get an image rejected after conversion.
- The file name ends in
.jpgand the file opens normally in your gallery or file viewer. - The size is under the limit by a margin. Dokurapi's targets already leave 6%, and the 200 KB image tool is set up for the most common limit.
- Faces, text and edges still look sharp when you zoom to 100%. If not, raise the target or choose Keep original size.
- No unexpected white box appears where the original had a transparent background.
- The pixel dimensions meet any minimum the form states. The result line shows the exact width and height.
- You kept the original WebP in case you need to convert again with a different target.
For a wider look at shrinking images without ruining them, read how to compress an image. If you get stuck on a specific portal rule, the WhatsApp support button on every tool page reaches the Dokurapi team; please do not send personal documents in chat.
Frequently asked questions
How do I convert WebP to JPG for free?
Can I just rename .webp to .jpg?
Why is my JPG bigger than the WebP?
Does converting WebP to JPG reduce quality?
What happens to a transparent background?
Can I convert an animated WebP to JPG?
Is it safe to convert personal photos online?
Can I convert several WebP files at once?
Sources
- An image format for the Web (WebP), Google for Developers
- WebP frequently asked questions (maximum size, browser support), Google for Developers
- Image file type and format guide (JPEG has no alpha channel, WebP animation), MDN
- SNPMB: SNBP 2026 registration guide (PDF, Indonesian)
Need help?Result not quite right, or unsure about a form rule? Ask Dokurapi support on WhatsApp. Please do not send personal documents in chat.
Chat on WhatsApp