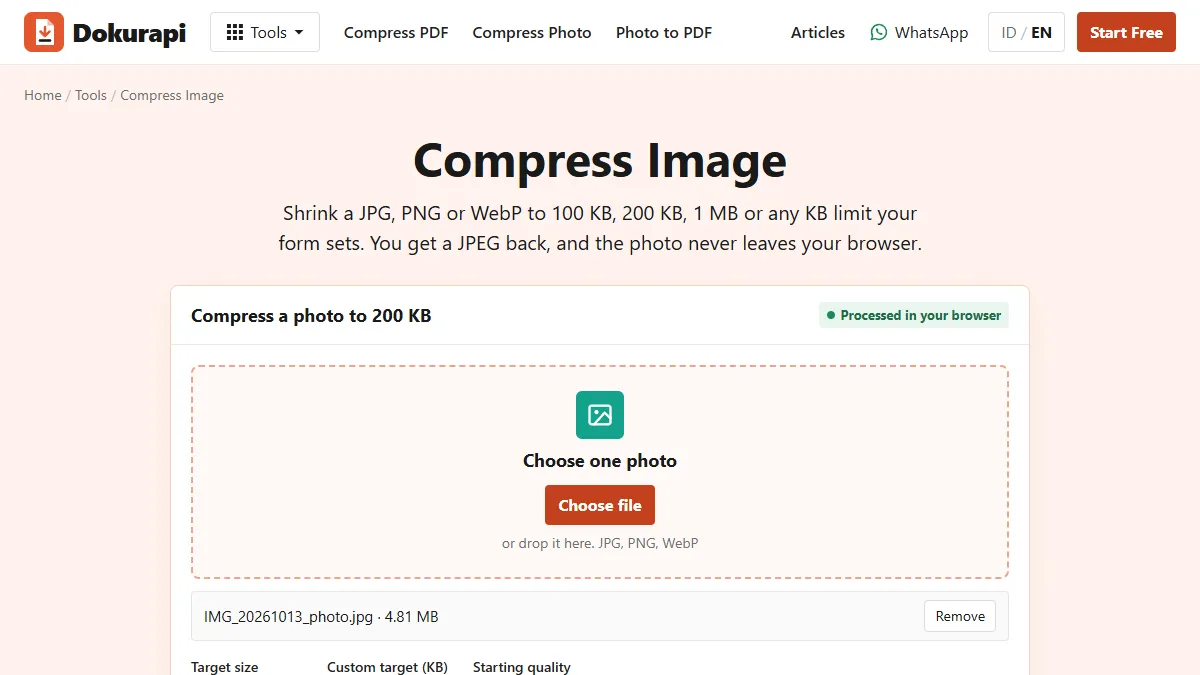
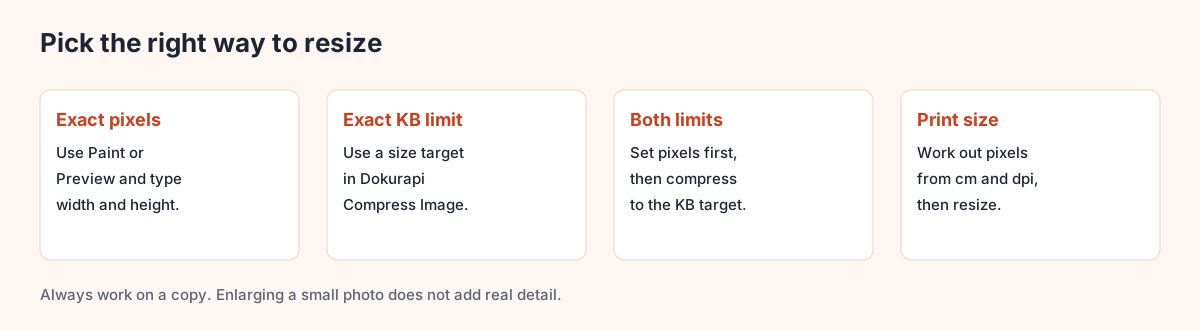
To resize an image, first check whether the rule is about pixels, file size or print size, then use the tool that controls that number. For exact pixels, use Paint on Windows or Preview on Mac. For a KB limit, use a size target such as Dokurapi's Compress Image tool, which works in your browser with no upload.
Most resizing mistakes happen because these numbers get mixed up. This guide separates them, shows the steps for each, and uses test runs with a synthetic sample image from 4 November 2026 so you can see what each choice does.
Pixels, KB and centimetres are not the same thing
"Resize" is used for three separate jobs. Pixel size is the width and height of the picture. File size is how much storage it takes. Print size is how large it appears on paper. A form may ask for any of them, and sometimes for two at once.
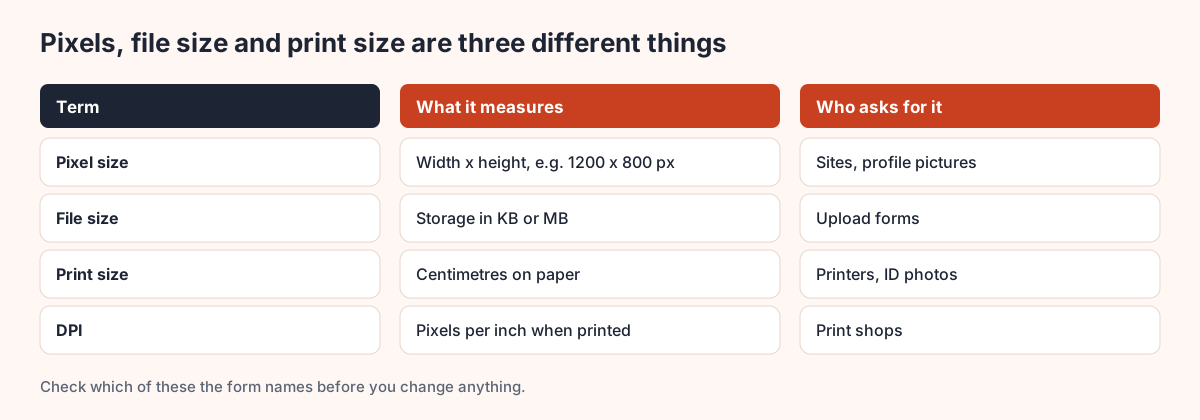
A quick example shows the difference. A 3000 x 2000 photo could be 400 KB as a JPG or several megabytes as a PNG, even though the pixels are identical. So when a portal says "maximum 200 KB", it says nothing about pixels. When a site says "1200 x 630 pixels", it says nothing about KB. If the size in KB is what confuses you, 200 KB to MB explains the units.
Ready to try it? The tool is free and runs in your browser.
Open the Compress Image toolHow to resize to exact pixels on a computer
Built-in apps are enough for this, and they keep the file on your computer.
Windows, using Paint. Microsoft's Paint help says you can use Resize on the Home tab and set the new size in pixels or as a percentage of the original.
- Open a copy of the image in Paint.
- Choose Resize on the Home tab.
- Select pixels, keep the aspect ratio option on, and type the width.
- Save the file.
Mac, using Preview. Apple's guide says to open the image, click the Adjust Size button in the Markup toolbar, and enter a new width and height, or choose a size from the "Fit into" menu.
- Open a copy in Preview and show the Markup toolbar.
- Click Adjust Size.
- Keep "Scale proportionally" selected so the picture does not stretch.
- Enter the width or height, then click OK and save.
Keeping proportions matters. If you force a 3:2 photo into a square, faces get stretched. When the shape must change, crop first and resize second. Each step should be done on a copy, because a saved resize cannot be undone later.
How to resize to a KB limit in your browser
Upload forms care about KB, and pixel editors do not show you the final KB until you save. A size target solves this.
- Open Compress Image and choose your JPG, PNG or WebP file.
- Pick a preset or type your limit in the custom KB box.
- Leave the pixel setting on "May shrink if needed", unless the form requires exact dimensions.
- Press Compress photo.
- Read the result box, then download the JPG.
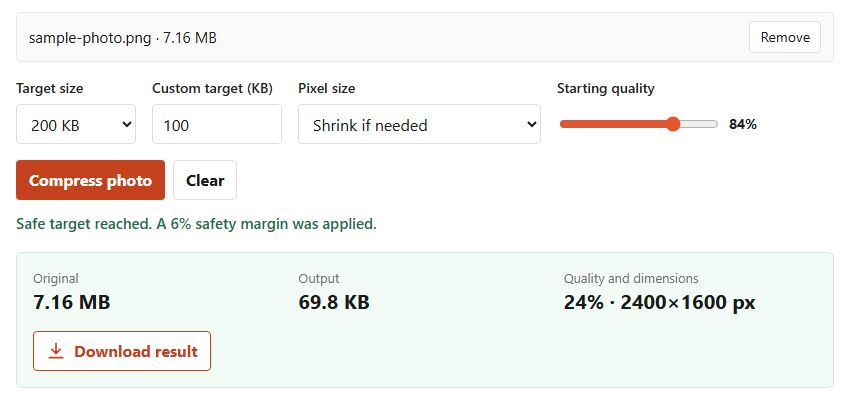
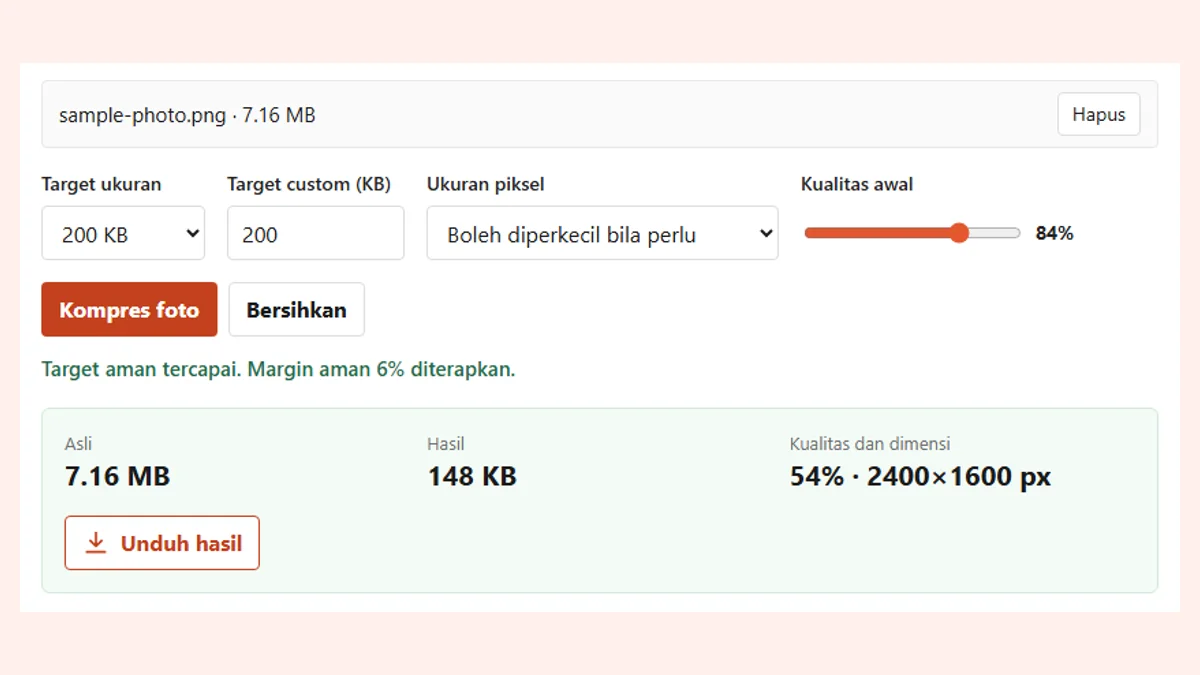
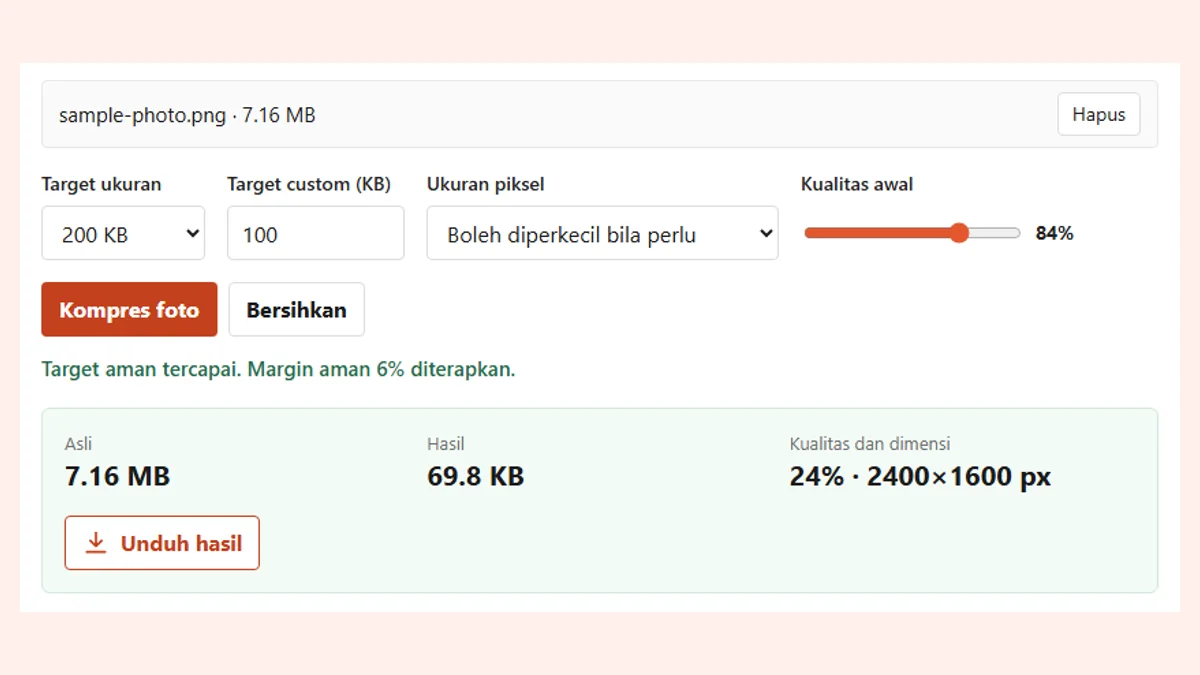
The tool aims 6% below your number, so a 100 KB target means about 94 KB. It lowers JPEG quality first. If quality alone cannot reach the target, and shrinking is allowed, it steps the dimensions down to a minimum of 640 pixels on the longest side. With "May shrink if needed", the longest side is also capped at 2400 pixels before it starts.
Presets save a step: 100 KB, 200 KB, 500 KB and 1 MB. The wider guide is how to compress an image.
What each choice does to the image
We ran one synthetic 3000 x 2000 PNG of 7.16 MB through the tool with different settings. The file is deliberately noisy, so treat these figures as an illustration of behaviour, not as a promise.
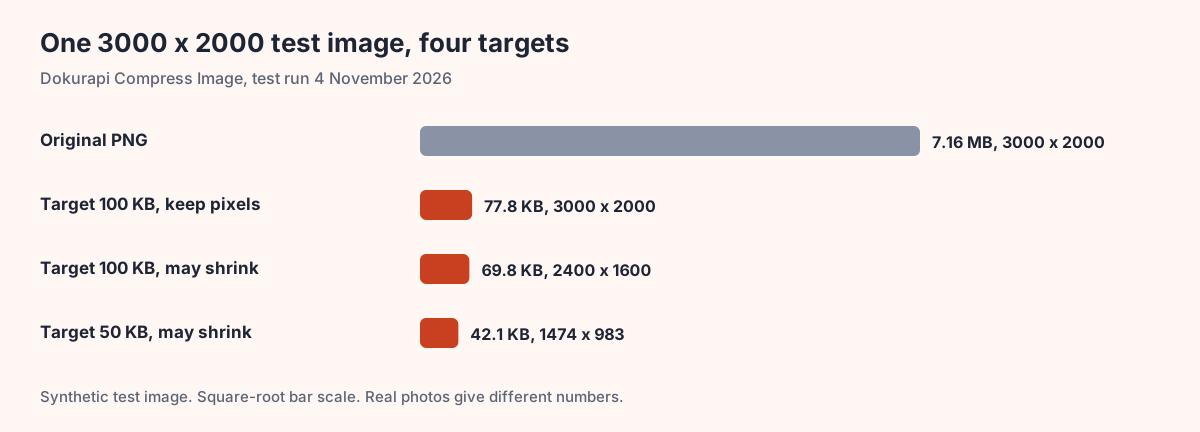
Three things stand out. First, the pixel cap applied as soon as shrinking was allowed, which is why 3000 x 2000 became 2400 x 1600 at a 100 KB target. Second, keeping pixels still hit the target, but only by lowering JPEG quality further. Third, at 50 KB the tool had to cut pixels to 1474 x 983. Compressing an image to 50 KB looks at that limit more closely.
| If the form says | Do this | Tool |
|---|---|---|
| Max 200 KB, no pixel rule | Use a KB target, allow shrinking | Compress Image |
| 1200 x 630 pixels, no KB rule | Set pixels exactly | Paint or Preview |
| 600 x 800 pixels and max 100 KB | Set pixels first, then compress with pixels kept | Paint or Preview, then Compress Image |
| 3 x 4 cm photo | Crop to 3:4, then check dpi | ID photo tool |
| Nothing specific | Keep the original, resize only if upload fails | None |
When a form limits pixels and KB together
Order matters. Set the pixels first, then reduce the KB. If you go the other way, the second step can push the file over the limit again.
- Resize to the exact pixels in Paint or Preview, and save a copy.
- Open that copy in Compress Image.
- Set the KB target and choose "Keep original size".
- Check the result box shows the dimensions you need.
If the result is still too large, or looks poor at the size required, what to do when a compressed file is still too big covers the next options.
Resizing for print and ID photos
Print size links centimetres to pixels through dpi. The formula is: pixels = centimetres / 2.54 x dpi. A 3 x 4 cm photo at 300 dpi is about 354 x 472 pixels, and a 4 x 6 cm photo at 300 dpi is about 472 x 709 pixels.
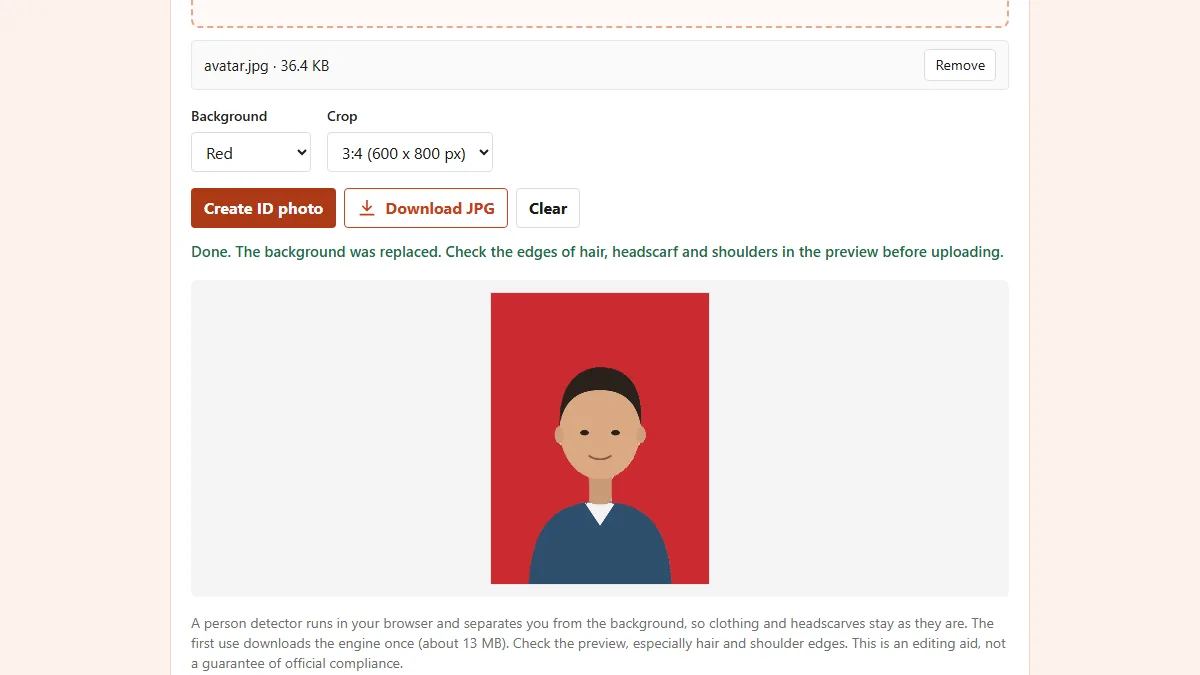
For ID photos, shape matters as much as size. A 3x4 photo has a 3:4 ratio, while 4x6 and 2x3 share a 2:3 ratio. Our ID photo tool crops to these shapes in your browser, and the guides to 3x4 photo size, 4x6 photo size and 2x3 photo size list pixel figures.
A job application is a common case. Photo for a job application shows which size and background to use.
Can you make a small image bigger?
You can increase the pixel numbers, but the software only guesses the new pixels from the existing ones, so the picture gets softer. It is fine for a small increase. It will not rescue a tiny photo.
If a form sets a minimum pixel size and your photo is below it, go back to the original or take a new photo. Messaging apps often reduce photos when you send them, so the copy in a chat may be much smaller than the one on the phone that took it. Sending it as a document usually avoids that.
Also check whether the form is really asking for pixels. A rule that names a minimum KB is unusual, and raising the KB of a file does not add detail either.
Resizing on a phone
Camera photos are often several megabytes, while upload limits are often a few hundred kilobytes. The quickest route on a phone is to open Compress Image in the browser, pick the photo from your gallery and type the limit. Choose the original photo rather than a copy from a chat app, because chat apps often reduce quality. Give the phone a moment on very large files, since the work happens on the device, and wait for the result box before you close the tab.
Common resizing mistakes
- Editing the only copy. Once saved, removed pixels are gone.
- Stretching instead of cropping. Faces and logos look wrong straight away.
- Resizing several times. Each JPG save loses a little more. Go back to the original.
- Ignoring the format list. A form may reject PNG even if the size is fine. See PNG to JPG.
- Forgetting to check the result. Open it and read any small text before uploading.
Files stay on your device with Dokurapi, because the browser does the processing. How browser-based tools work explains what that means for private photos and documents.
Frequently asked questions
What does it mean to resize an image?
How do I resize an image without losing quality?
How do I resize an image to a specific KB?
Does Dokurapi let me type exact pixel dimensions?
Does resizing change file size?
How many pixels is a 3x4 photo?
Why did my image look blurry after resizing?
Can I resize a photo on my phone?
Sources
- Crop, resize, or rotate an image in Preview on Mac, Apple Support
- Draw, Create, and Edit with Paint, Microsoft Support
- Image file type and format guide, MDN Web Docs
Need help?Result not quite right, or unsure about a form rule? Ask Dokurapi support on WhatsApp. Please do not send personal documents in chat.
Chat on WhatsApp