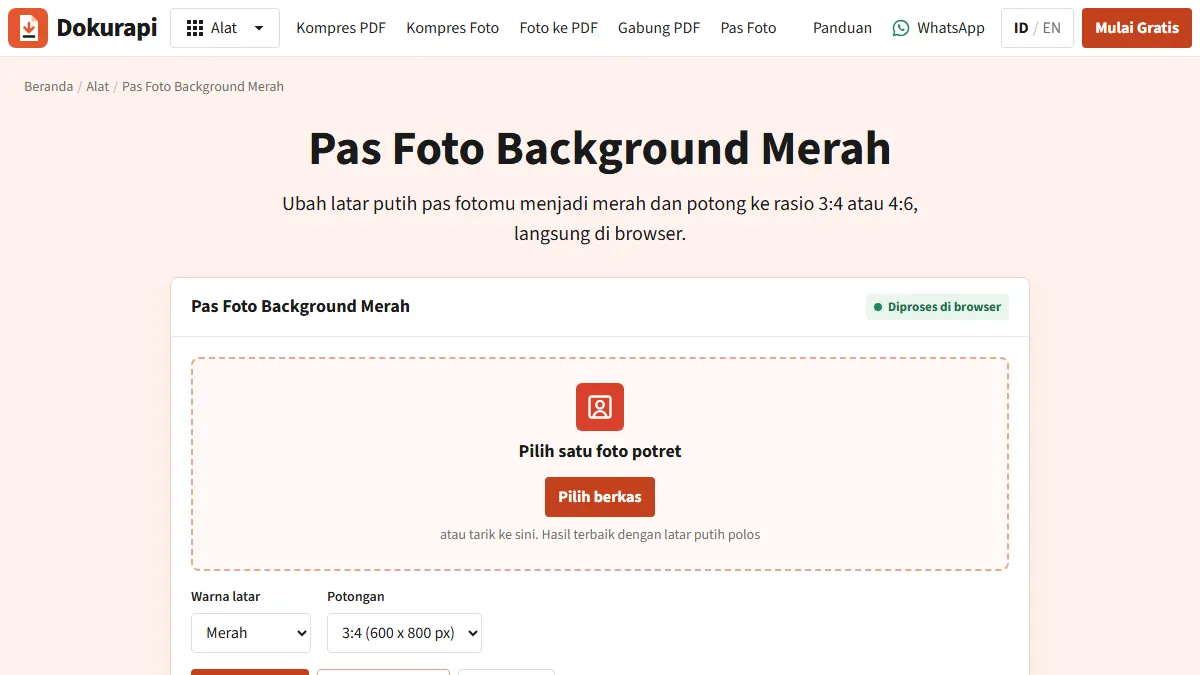
To make a red background passport photo at home, shoot yourself against a plain wall (white, cream, grey or even blue all work), open the Dokurapi red background ID photo tool, pick a 3:4 or 4:6 crop and download the JPG. The tool separates you from the background with a person-segmentation model, replaces the background with a solid red, crops from the centre and does all of it inside your browser, so the photo never leaves your device. Before you start, check one thing: actual passports almost never use red. Red backgrounds belong to specific application forms, and that form's current notice is the rule you must follow.
Who actually asks for a red background
In everyday speech across India and Indonesia, "passport photo" or "passport-size photo" usually means a small formal head-and-shoulders portrait, not a photo for a passport application. That is why people search for a red background passport photo even though passport offices themselves tend to require light backgrounds, as the next section shows.
Red shows up in a few well documented places, all of them Indonesian:
| Application | What the official source says | Note |
|---|---|---|
| Civil service (CPNS) via SSCASN | Pas foto with a red background, max 200 Kb, jpeg/jpg | Example from the 2023 CPNS FAQ published by BKN |
| CPNS application letter | A recent photo in formal clothing with a red background | BKN's 2021 application letter template |
| Police clearance (SKCK), online or at the counter | Red background for Indonesian citizens, yellow for foreign nationals | Police Regulation No. 1 of 2026, Articles 5 and 14 |
| SKCK at one district police office | 4 x 6 cm colour prints, six copies, collared clothing, face and both ears visible | Polres Bantul; other offices may ask differently |
The 200 KB figure is the 2023 CPNS example, not a promise about this year's intake. Agencies can change sizes, formats and dress rules each cycle. If you are applying through SSCASN, our SSCASN upload requirements guide collects the document limits with their sources.
Ready to try it? The tool is free and runs in your browser.
Open the red background ID photo toolWhen you should not use red
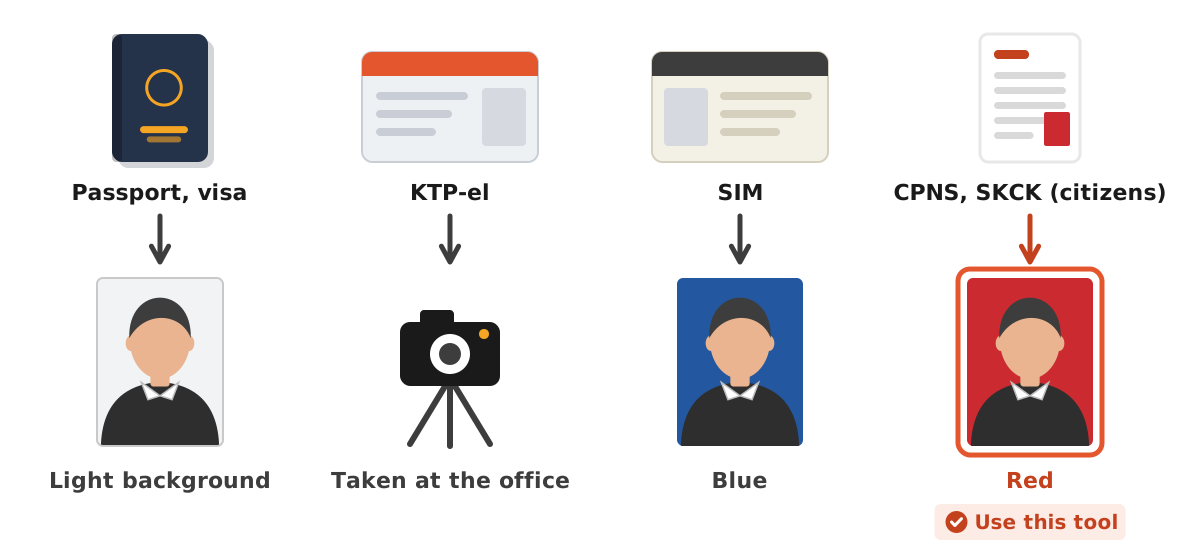
Red is a deliberate choice for a handful of forms, not a safe default. Several common documents want a different colour or do not need a home-made photo at all:
- Real passports and visas. The UK government's passport photo rules ask for a plain light-coloured background with no other objects or people. For a new Indonesian passport, Indonesian immigration lists photo and fingerprint capture as part of the process at the office.
- The Indonesian ID card (KTP-el). Staff take the photo during data recording, and the colour follows your birth year: red for odd years, blue for even years, according to the civil registry offices of Klaten and Gunung Mas. There is nothing for you to make.
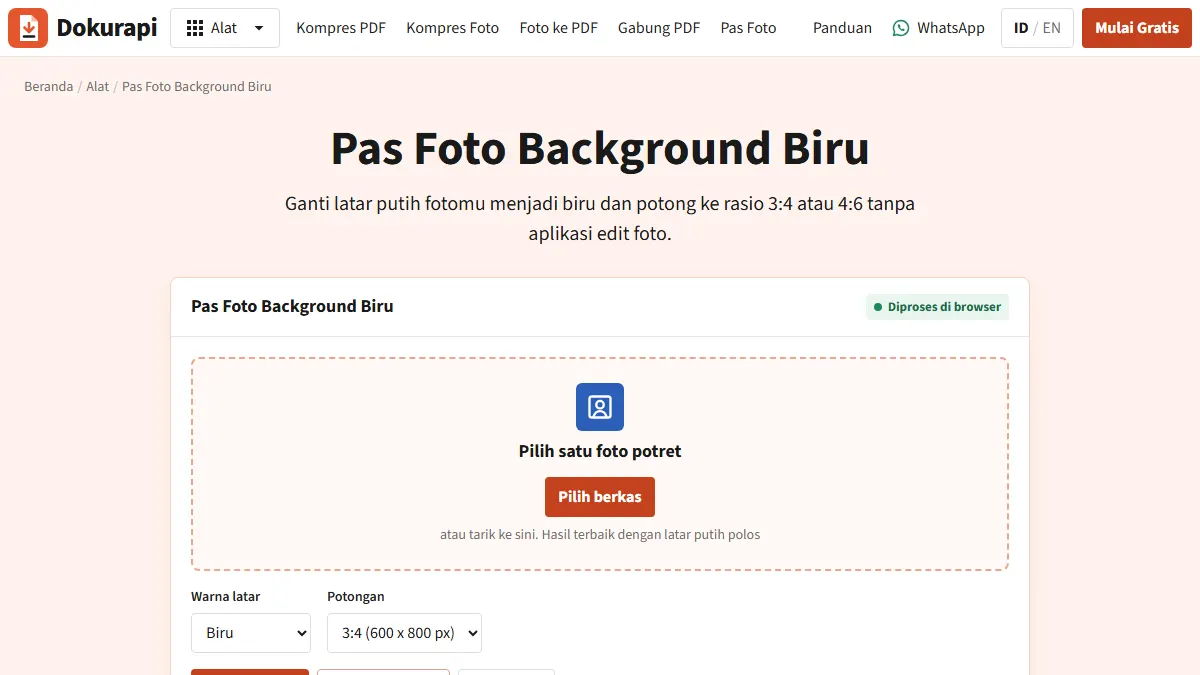
- The driving licence (SIM). Indonesia's online renewal asks for blue. Read the blue background passport photo guide, because some forms want a genuinely blue backdrop rather than a swapped one.
- Any form that names white, light or blue. Follow the form. The blue background tool works the same way as the red one.
The ladder below sums it up.
Step by step: making the photo
- Take the source photo. Stand about one metre in front of a plain wall or a sheet of plain card in any calm colour. Camera at eye level, face straight on, shoulders in frame, nobody else in the picture.
- Open the red background tool. No account, no payment. The page loads the code it needs and processing happens in that browser tab. The first time, it also downloads the background recognition engine once (about 13 MB) and keeps it in the browser cache.
- Choose your file. Drag it onto the drop area or click to browse. The tool takes one image per run.
- Select Red and a crop. 3:4 suits 3x4 cm photos, 4:6 suits 4x6 cm photos. The crop is taken from the centre of your image.
- Click Create ID photo. Check the preview around your hair, ears, collar and the edges of the frame.
- Download the JPG. It is saved as something like
dokurapi-pasfoto-red-3x4.jpg. Rename it if the form wants a naming pattern. - Check the file size against the form's limit before uploading.
A 3:4 crop comes out at 600 x 800 pixels and a 4:6 crop at 600 x 900 pixels, saved as a JPG at quality 92%. That is plenty for an online form. If a form names exact pixel dimensions, follow the form.
How the background swap works (and what it keeps)
The tool runs a person-segmentation model, MediaPipe Selfie Segmenter by Google (Apache-2.0 licence), inside your browser tab. The model estimates, pixel by pixel, how likely it is that each part of the picture belongs to a person. Everything it marks as background is replaced with red RGB 202, 42, 48, which is #CA2A30, and the edge is cleaned so the old wall colour does not leave a coloured outline on your hair. The engine is served from Dokurapi itself, and your photo is never uploaded. Our guide to how browser-based tools work explains that in more detail.
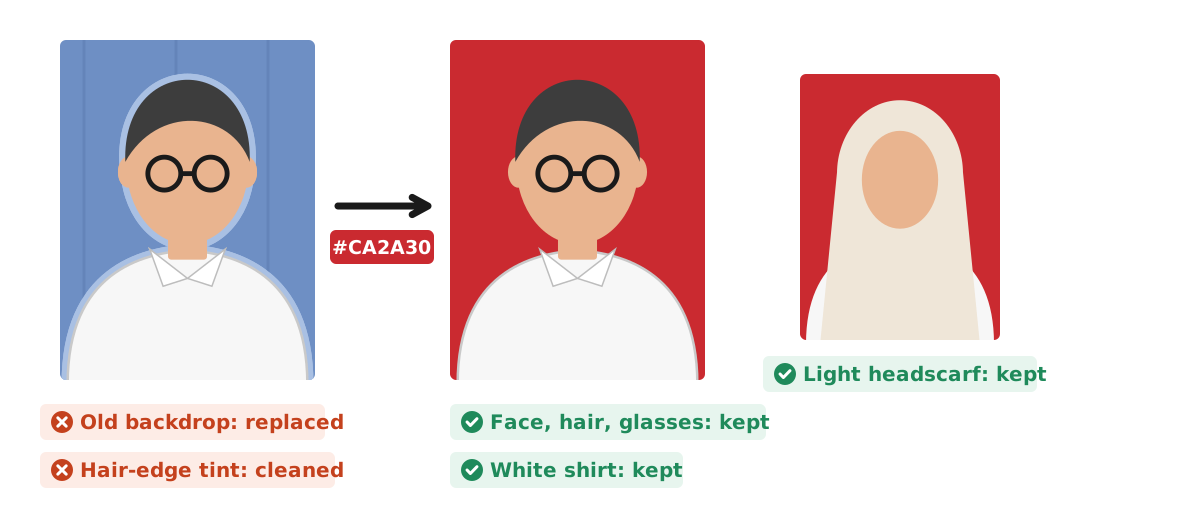
- The wall does not have to be white. White, cream, grey, blue, or a red of the wrong shade all work. An existing blue studio background can be switched to red.
- Clothing is kept. A white shirt, a light headscarf, glasses and skin stay as they are, because the tool replaces the background area rather than a range of colours.
The model is not perfect. Busy backgrounds such as shelves or patterned curtains, other people or objects behind you, raised hands, and bags at the edge of the frame may be cut off or leave small artifacts. Very fine hair strands are simplified into a smoother outline. A plain wall and a simple pose avoid nearly all of this.
Shooting tips for a clean result
Most problems with home-made ID photos start with the source photo, not the tool. The segmentation model reads the outline of your head and shoulders, so anything that blurs that outline makes its job harder.
- Face a window in daylight so the light falls evenly on your face.
- Leave half a metre to a metre between you and the wall so your shadow does not land behind you.
- Turn the flash off. It makes foreheads shiny and throws a hard shadow on the wall.
- Ask someone else to take the picture. Arm's-length selfies tilt the head and wide lenses distort features.
- Use the rear camera, which is usually sharper than the front one.
- Leave some space above your head, since the automatic crop takes the centre of the frame.
- Keep your expression neutral, mouth closed, eyes open.
If your wall is patterned or cluttered, tape a plain sheet or a large piece of card behind you. It does not need to be any particular colour, only plain. Keep your hands down and make sure you are the only person in the frame.
Checking the red before you upload
The tool always uses the same red, RGB 202, 42, 48. The official texts in the table above only say "red" (merah) and do not give a colour code, so a clean, even red matches what they ask for. If a notice ever names an exact code, follow the notice.
Screens change how red looks. The same file can look bright on a phone and darker on a laptop, so judge the file, not one screen. A quick check that takes a minute:
- Open the downloaded JPG in your gallery or photo viewer, not the preview in the browser tab.
- Zoom in on the hair, ears and shoulders and look for a thin outline in the old wall colour.
- Look at the corners and the edges of the frame for leftover patches of the old background.
- Check that your clothes stand out clearly from the red.
Do not run the finished photo through colour filters or beauty modes. They shift your skin and the background together and can make the red patchy. If something looks wrong, reshoot and run the tool again.
Common mistakes with red background photos
These are the mistakes that most often waste an attempt, and each one has a simple fix.
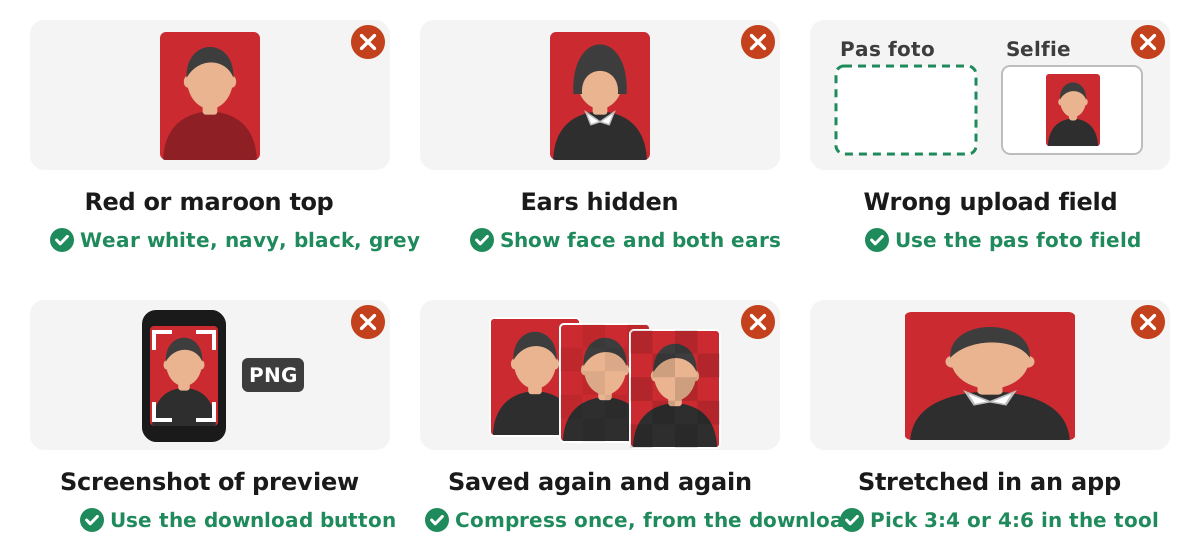
- Wearing red, maroon or orange. The tool keeps your clothes, so a red top stays red and blends into the background. The UK rules ask for clear contrast with the background, which is good advice anywhere. White, navy, black or grey work well.
- Hiding your ears. Polres Bantul asks for the face and both ears to be visible; headscarf wearers must show the full face without a face veil.
- Uploading to the wrong field. The 2023 SSCASN FAQ lists the pas foto and the selfie (swafoto) as separate uploads.
- Screenshotting the preview. A screenshot changes the pixel size and may save as PNG. Use the download button.
- Re-saving repeatedly. Each JPG save loses a little detail. Compress once, from the downloaded file.
- Stretching the photo in another app. Pick 3:4 or 4:6 in the tool instead.
Getting the file under 200 KB
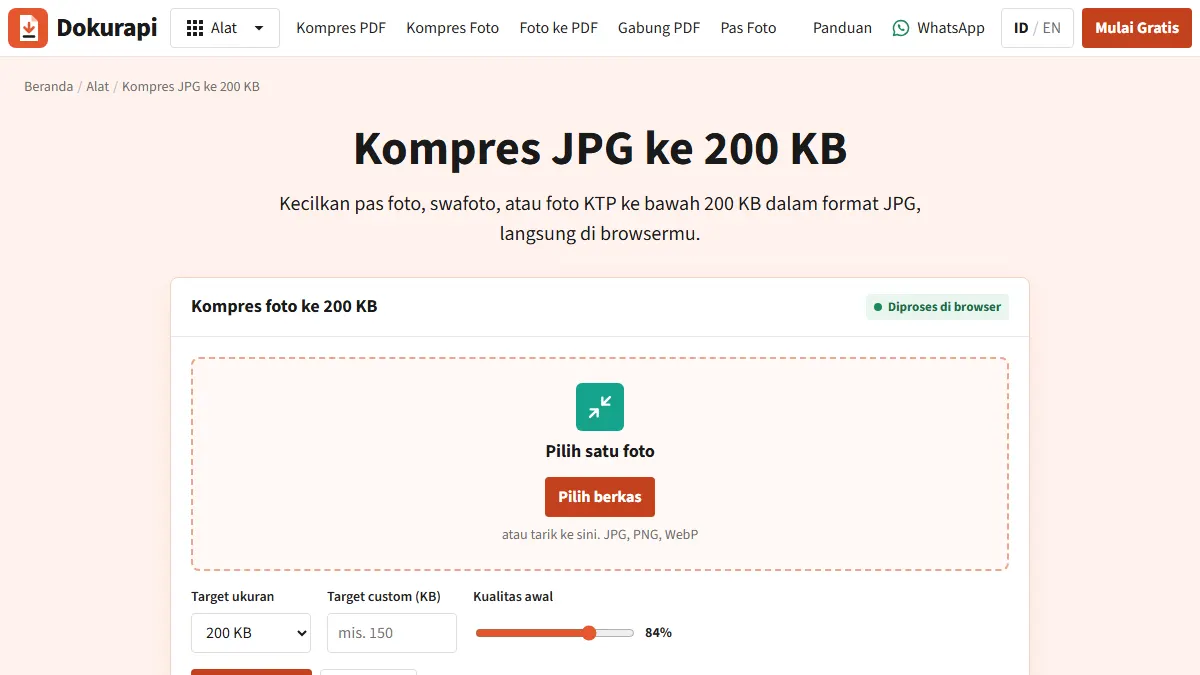
The ID photo tool saves a JPG at quality 92%, so check its size. If the form's limit is 200 KB, run the file through the compress photo to 200 KB tool; the 200 KB photo guide covers it in depth.
Two details explain most "but it says 200 KB" confusion. Dokurapi counts 1 KB as 1,000 bytes, while Windows divides by 1,024, so File Explorer can show a slightly different number. Dokurapi also applies a 6% safety margin: a 200 KB target becomes 188,000 bytes, and a 100 KB target becomes 94,000 bytes. Our article on checking file size before upload shows how to read the exact byte count.
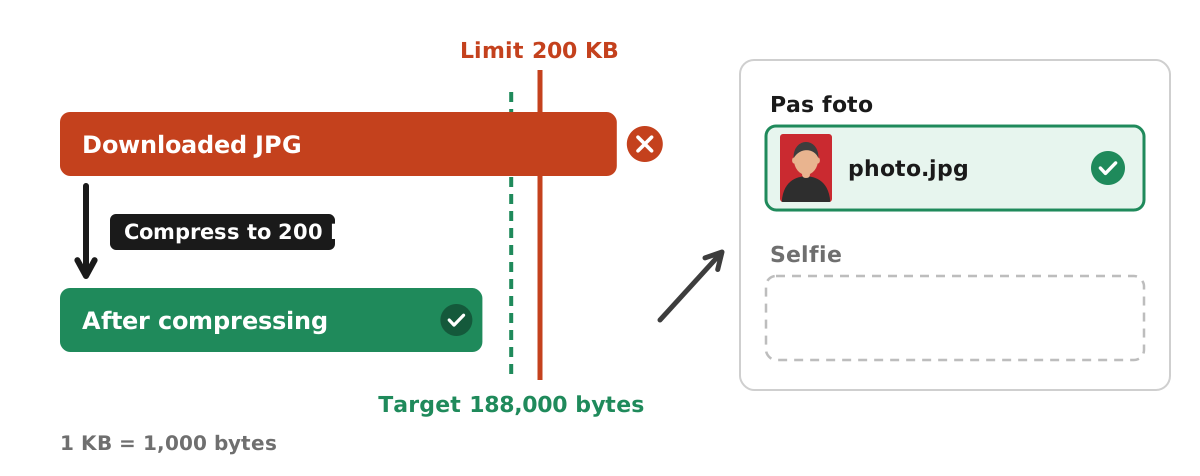
The compressor lowers JPG quality in steps first. Only if the lowest quality is still too big does it shrink the pixel dimensions, never below 640 px on the longest side, and it shows the final size in pixels. If it still misses, see what to do when a compressed file is still too big.
Some forms want the photo as a PDF. Use the photo to PDF tool, or read how to turn a JPG into a small PDF. The PDF holds an image, not text, and carries no digital signature.
Troubleshooting
Part of the background was kept, or part of me was cut
This usually happens with a busy background, another person or object behind you, or a hand, bag or shoulder touching the edge of the frame. Reshoot against a plainer wall, alone, with your hands down and some space around your shoulders.
Fine hair looks smoothed at the edges
The model simplifies very fine strands into a smoother outline, and the edge is cleaned so the old wall colour does not show as a coloured fringe. At ID photo size this is rarely noticeable. Tying back loose hair gives a crisper edge.
The tool says no person was detected, or the photo will not process
Use a front-facing portrait where your head and shoulders fill a good part of the frame. If the photo cannot be processed at all, the browser may be too old for the recognition engine; try an up-to-date Chrome or Firefox.
The file is still too big, or blurry after compression
Heavy compression makes edges blocky. Crop tighter before compressing, since a face that fills the frame stays legible at lower quality.
The portal still rejects it
Check the extension (some portals accept only .jpg or .jpeg), the size in bytes, and that you are uploading to the photo field rather than a selfie field. If everything matches, contact the portal's helpdesk.
Pre-upload checklist
Run through this list once, with the downloaded file open, right before you press upload. It catches nearly every avoidable rejection.
- The form really asks for red, according to its current notice.
- The crop ratio matches: 3:4 for 3x4, 4:6 for 4x6.
- Face straight on, eyes open, no heavy shadows, neutral expression.
- Ears and face visible if the office asks for them, no face veil.
- Clothing contrasts with the red and follows any dress rule (formal or collared).
- Hair, headscarf, shoulders and the frame edges look clean, with no leftover background.
- File size is under the limit, counted in bytes.
- Format and file name match what the form asks for.
- You are uploading to the pas foto field, not the selfie field.
- The file opens normally in your gallery, so it is not damaged.
Keep the original photo and the final file together in one folder. If a portal asks for a different ratio or a smaller size later, you can redo one step from the original instead of reshooting, and you never compress an already compressed copy.
The honest limits
Dokurapi cannot guarantee that any portal will accept your photo. It does not check biometric rules, head position or dress codes, and it cannot sharpen a blurry original. What it does is narrow and verifiable: crop to your chosen ratio, separate you from the background and replace it with red, save a JPG, all in your browser. Always check the preview, because the segmentation model can still miss on busy or crowded photos.
Because the work happens on your own device, there is no copy of your face on a Dokurapi server to delete afterwards. Closing the tab clears the photo from the page.
It also offers only red and blue, so it cannot make the yellow background that the SKCK regulation asks of foreign nationals. Whenever an agency's current announcement says something different from this guide, the announcement wins.
Frequently asked questions
Can I use a red background photo for my passport?
What size should a red background photo be for CPNS?
Will my white shirt or headscarf turn red?
Is my photo uploaded to a server?
What pixel size does the tool produce?
Does my wall have to be white?
Why is the first photo slower than the next ones?
Can I print the downloaded photo for an SKCK counter application?
Can the tool make a yellow background for a foreign national's SKCK?
Sources
- BKN, SSCASN CPNS FAQ 2023 (document sizes and types)
- Indonesian Police Regulation No. 1 of 2026 on police clearance (SKCK)
- GOV.UK, Photos for passports
- BKN, CPNS application letter template 2021 (red background photo in formal clothing)
- Polres Bantul, SKCK requirements (4 x 6 cm, red background, both ears visible)
- Directorate General of Immigration, new passport (photo taken at the office)
- Disdukcapil Klaten, KTP-el photo background colours
- Disdukcapil Gunung Mas, KTP-el photo background red or blue
Need help?Result not quite right, or unsure about a form rule? Ask Dokurapi support on WhatsApp. Please do not send personal documents in chat.
Chat on WhatsApp