Image DPI (dots per inch) is the number that says how many dots or pixels are printed in one inch. For a photo you only upload to an online form, DPI barely matters, because portals check the pixel dimensions and the file size in KB. DPI starts to matter when you print, since it is the number that turns pixels into inches. The formula is simple: pixels = inches x DPI. A 4 x 6 inch print at 300 DPI needs 1200 x 1800 pixels.
This guide explains what DPI means and how it differs from PPI, how to work out the pixels you need for a print size, which DPI values you will run into, how to check the DPI of an image on Windows and Mac, and what we found when we tested files from the Dokurapi image compressor.
What image DPI means, and how it differs from PPI
DPI comes from printing. A printer lays down tiny dots of ink, and DPI counts how many of those dots fit in one inch. As the Wikipedia article on dots per inch notes, a printer usually needs a much higher DPI than the PPI of a display to produce similar quality, because each ink dot can only show a limited range of colours.
PPI (pixels per inch) is the digital counterpart: how many pixels are placed in one inch when the image is printed or displayed. In everyday software the two terms are used interchangeably. Windows calls it "dpi" in the file Properties, Microsoft Office calls it "ppi", and Preview on Mac calls it "Resolution". They all mean the same thing here: pixel density on paper.
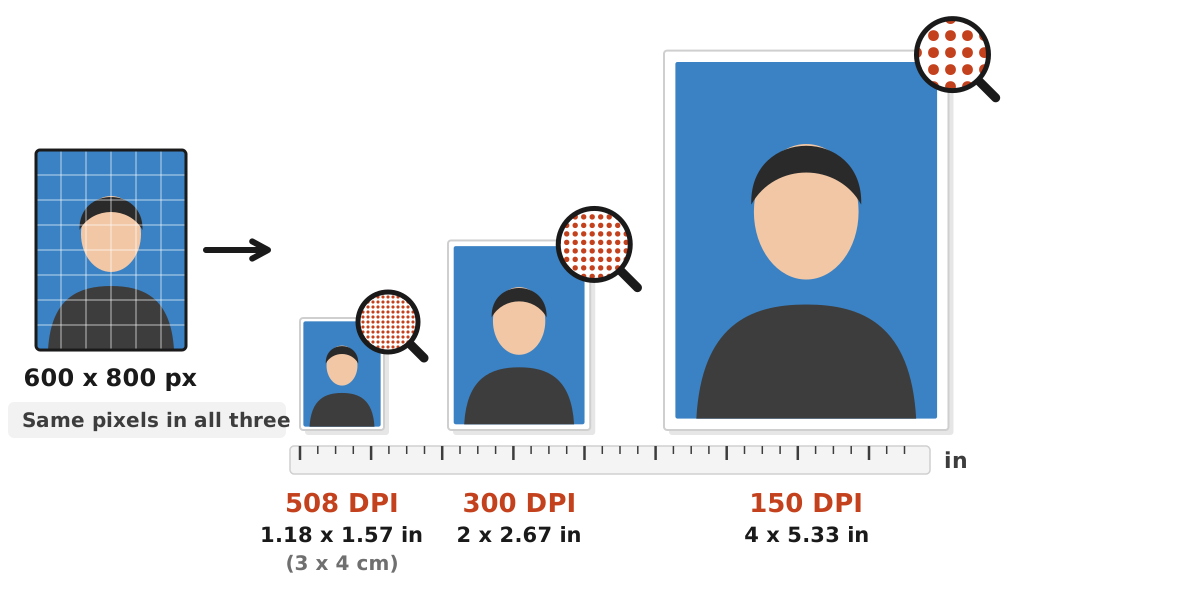
The key idea is that a digital photo is only a grid of pixels. A 600 x 800 pixel photo has no physical size until you decide how densely to print it. The DPI value saved in the file is just a suggested print size, not part of the picture. That is why two apps can report different DPI values for the exact same photo while the image itself has not changed by a single pixel.
Ready to try it? The tool is free and runs in your browser.
Open the image compressorThe formula for pixels, DPI and print size
Every DPI calculation comes from three versions of the same equation:
- Pixels = inches x DPI. A 4 inch wide print at 300 DPI needs 4 x 300 = 1200 pixels.
- Print size (inches) = pixels / DPI. An image 600 pixels wide printed at 300 DPI comes out 2 inches wide.
- Effective DPI = pixels / inches. A 600 pixel wide image squeezed into 1.18 inches (3 cm) prints at about 508 DPI.
If you work in centimetres, divide by 2.54 first, because one inch is 2.54 cm. The table below applies the first formula to common print sizes.
| Print size | 300 DPI | 150 DPI |
|---|---|---|
| 2 x 2 in (passport style) | 600 x 600 px | 300 x 300 px |
| 4 x 6 in | 1200 x 1800 px | 600 x 900 px |
| 5 x 7 in | 1500 x 2100 px | 750 x 1050 px |
| 8 x 10 in | 2400 x 3000 px | 1200 x 1500 px |
| 3 x 4 cm (1.18 x 1.57 in) | 354 x 472 px | 177 x 236 px |
Read the table in one direction. If your photo already has more pixels than the number shown, it is sharp enough to print at that size. If it has fewer, raising the DPI value in the metadata will not help, because missing detail cannot be invented. For photo sizes measured in centimetres, see 3x4 photo size, 4x6 photo size and 2x3 photo size.
What DPI do you need?
There is no single correct DPI. The right value depends on where the image will be seen. This table collects the numbers you are most likely to meet and where they come from.
| Use | Value | Where it comes from |
|---|---|---|
| Photo prints and ID photos | 300 DPI | The usual benchmark print shops and photo requirements quote |
| Pictures inside Office files | 220 ppi | Default picture resolution in Microsoft 365 when pictures are compressed |
| CSS units in a browser | 96 px per inch | The W3C CSS definition 1in = 96px |
| Windows display default | 96 ppi | Windows assumption dating back to the 1980s |
| Classic Mac display default | 72 ppi | Apple convention matching 72 points per inch |
| Dokurapi 3:4 ID photo printed at 3 x 4 cm | about 508 DPI | 600 x 800 px over 1.18 x 1.57 in |
The 220 ppi figure comes from Microsoft Support on reducing picture file size, which states that the default picture resolution in Microsoft 365 is 220 ppi. The 96 px per inch figure is part of the W3C CSS Values and Units specification. The 72 and 96 display defaults are recorded in the Wikipedia article linked above.
For online forms, none of the screen numbers matter. Upload portals usually limit the file size, such as 200 KB, and sometimes the pixel dimensions. If you are unsure about the limit, read how to check file size before uploading.
Changing the DPI value does not add detail
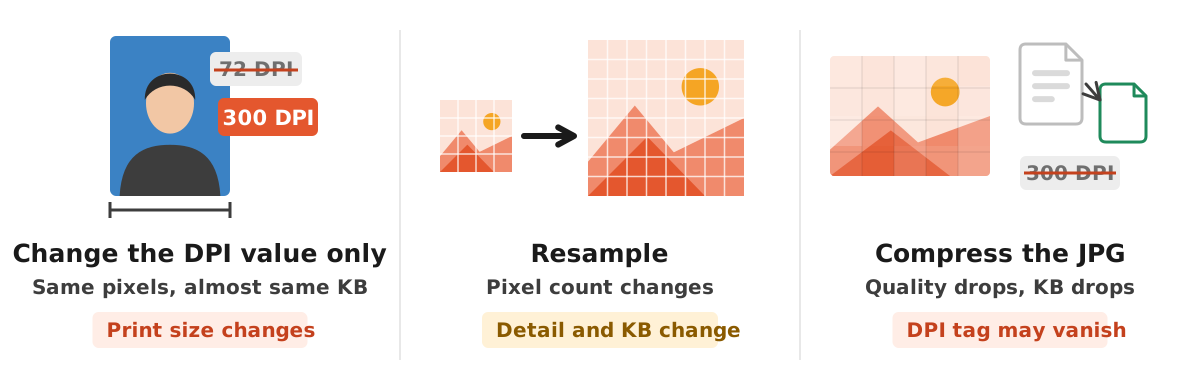
A common belief is that a "72 DPI" image must be converted to "300 DPI" to look sharper. In practice there are three different operations, and only one of them changes the picture itself.
- Changing the DPI value only. Same pixels, same image, almost the same file size. Only the suggested print size changes. In Preview on Mac you do this by turning off resampling before you change the number. The Apple Support guide for Preview describes the Tools, Adjust Size dialog used for this.
- Resampling. The pixel count is recalculated. Scaling down throws detail away and shrinks the file. Scaling up makes the app guess new pixels, so the image gets bigger but not sharper.
- Compressing the JPG. JPEG quality drops, sometimes the pixel size too, so the KB number falls. The DPI tag can disappear along the way, as our test below shows.
So a blurry photo will not become sharp because its DPI value goes up. For good prints, start from the original photo with enough pixels, then adjust its size with how to resize a photo if you need to.
How to check the DPI of an image on Windows, Mac and phones
Before you change anything, check two things: the pixel dimensions and the DPI value stored in the file. The steps depend on your device.
- Windows: right-click the image, choose Properties and open the Details tab. Under Image you will see Dimensions (pixels) and Horizontal resolution and Vertical resolution (the DPI value).
- Mac: open the image in Preview and choose Tools, then Adjust Size. The dialog shows width, height and Resolution, along with the resulting file size.
- Android or iPhone: the built-in gallery usually shows only the pixel size and file size in its details or info panel. Work out DPI yourself with the formula above, because phones rarely display it.
- Without extra apps: drop the image into the image compressor. After processing, the result box shows the pixel dimensions and KB size, which are the two numbers portals actually check.
If the DPI field is empty or shows 72 or 96, do not worry. That is often just the viewer's default when the file does not store its own DPI value. What decides print sharpness is still the number of pixels.
Test results: the DPI of files from Dokurapi tools
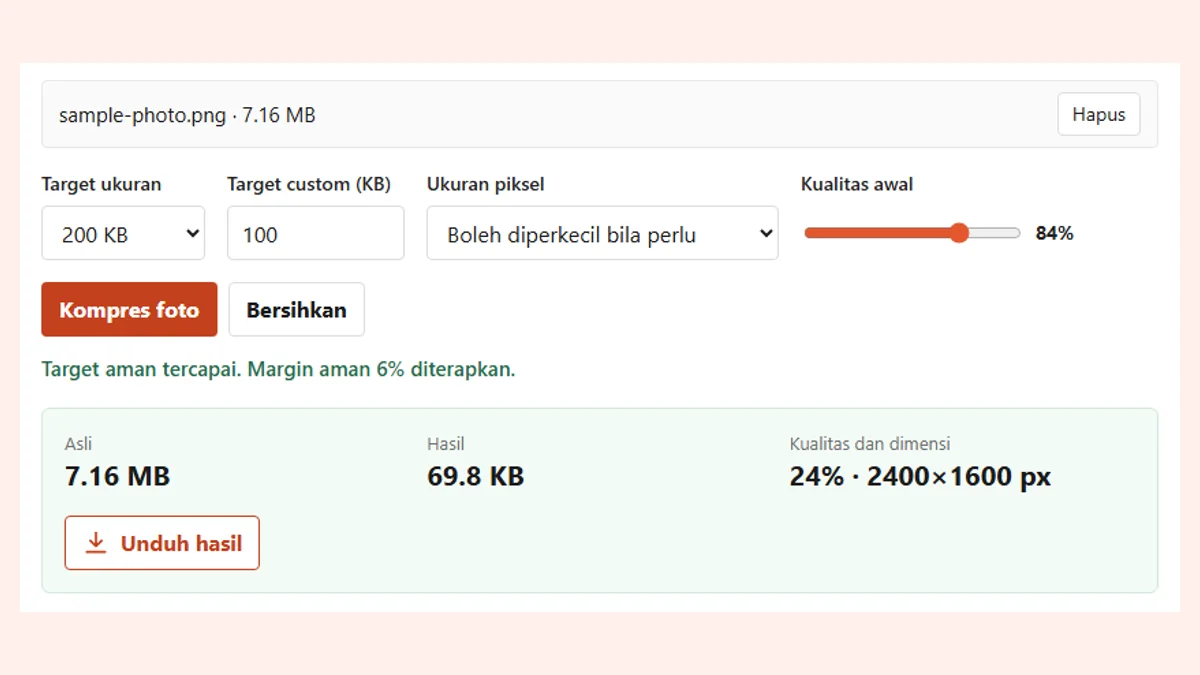
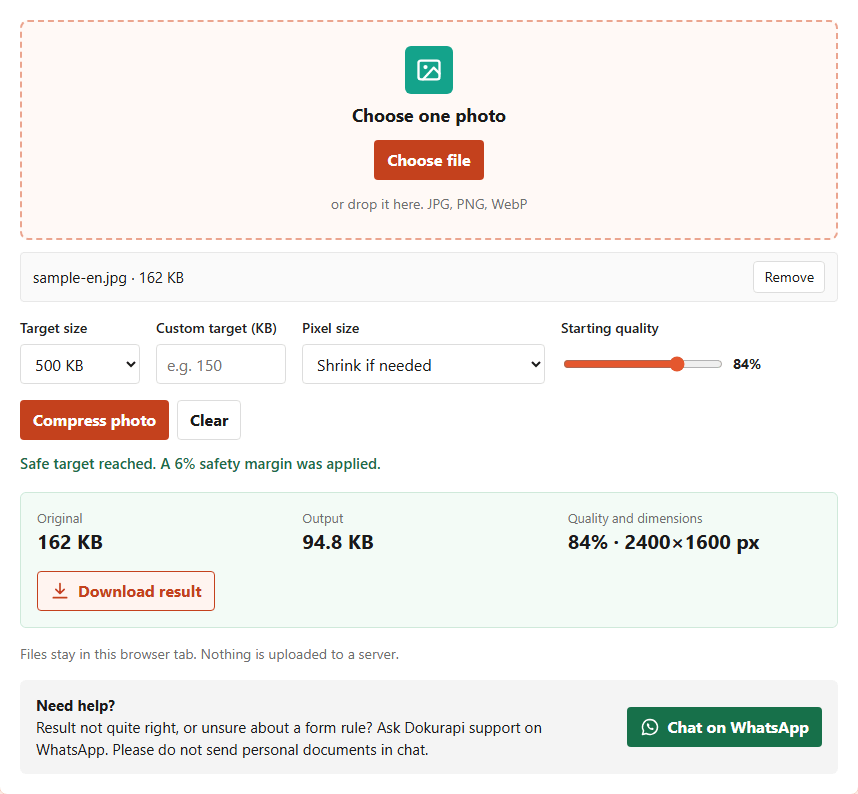
We tested the live tools on 7 November 2026 with a synthetic 3000 x 2000 pixel image that we deliberately tagged as 300 DPI (162 KB). In the image compressor with a 500 KB target and the "Shrink if needed" option, the result was 2400 x 1600 pixels, 94.8 KB, at 84% quality. The longest side was reduced to 2400 pixels because that is the tool's limit for that option.
We then read the JPEG header of the result. The JFIF marker held density units 0 with a 1:1 ratio. According to the JFIF specification on Wikipedia, units 0 means no units, only a pixel aspect ratio. In other words, the output stores no DPI value at all, so each viewer fills in its own default. The image library we used reported it as 72.
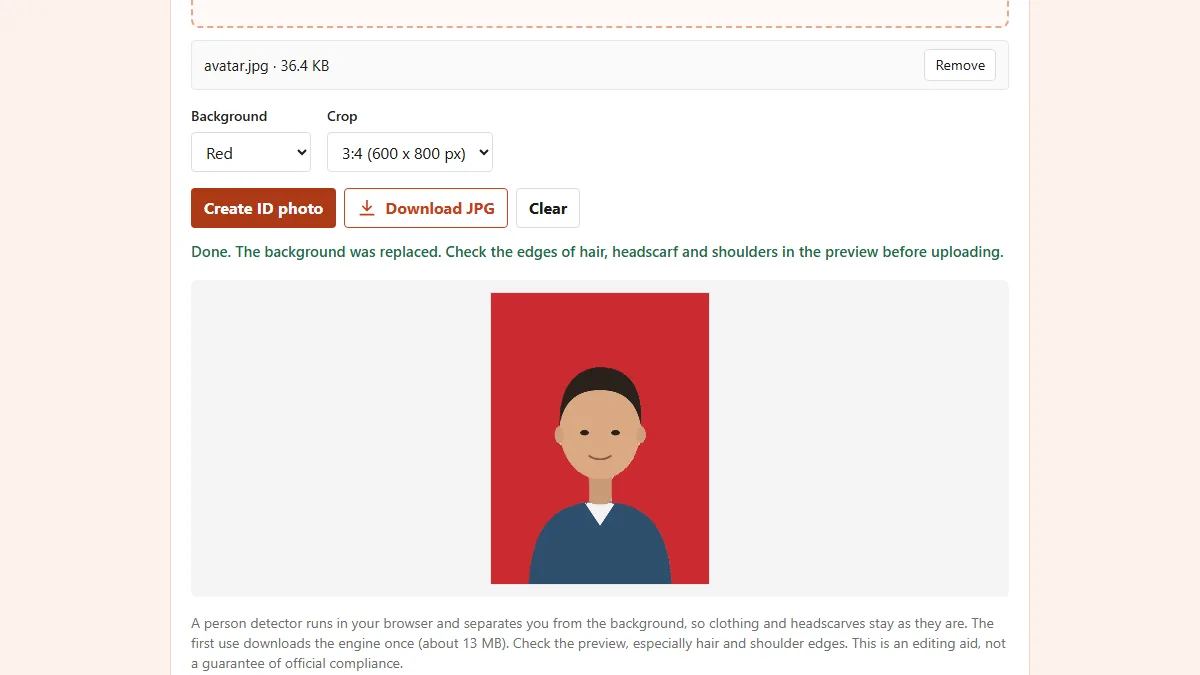
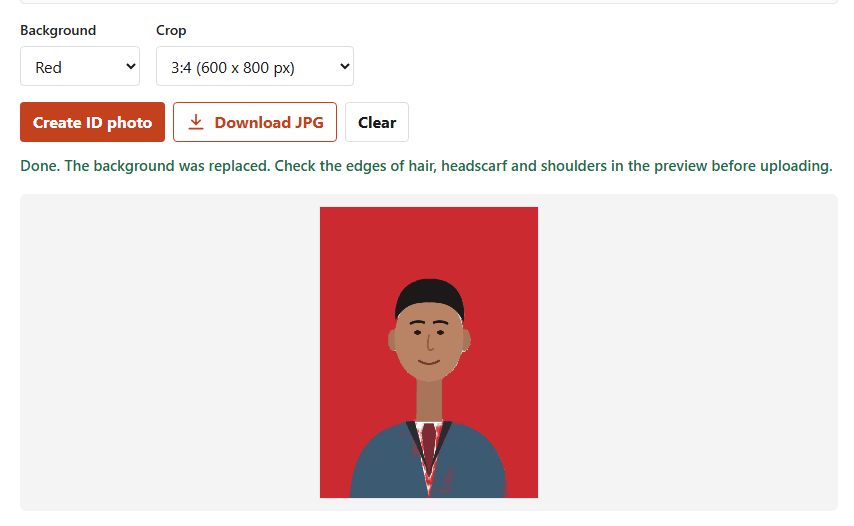
The second test used the red background passport photo tool with a 3:4 crop. The result was 600 x 800 pixels, about 21 KB, again with no DPI value. Printed at exactly 3 x 4 cm it lands at about 508 DPI, well above the 300 DPI benchmark, so the pixels from this tool are more than enough for a printed ID photo.
When a form asks for a 300 DPI photo
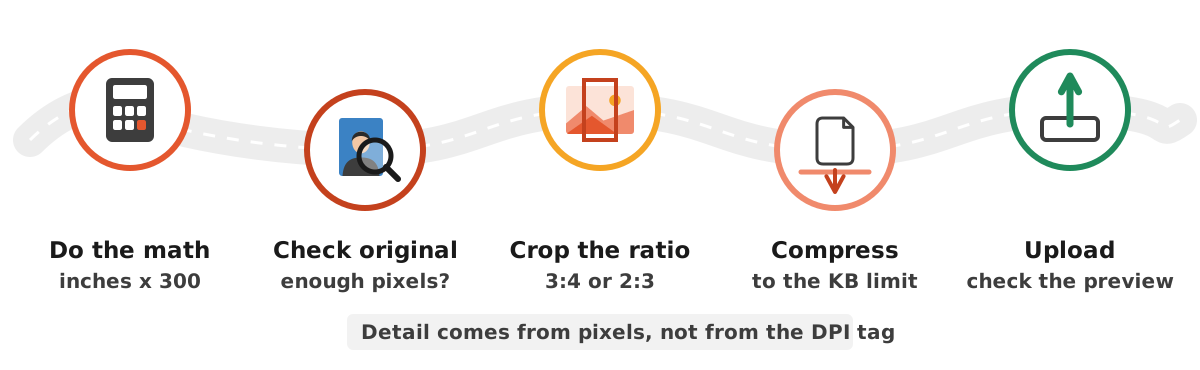
Some applications or print shops write "photo must be at least 300 DPI". What they usually mean is that the photo must be sharp enough at a given print size. A safe order of work:
- Work out the minimum pixels. For a 2 x 2 inch photo at 300 DPI that is 600 x 600 pixels.
- Check the original. If it already has more pixels, it meets the sharpness requirement.
- Crop to the ratio you need, for example with the blue background passport photo tool or the guide on how to crop a photo.
- Compress to the form's KB limit, for example with compress image to 200 KB.
- If the reviewer really checks the DPI value in the metadata (rare), change it in Preview on Mac without resampling, then submit that file without compressing it again.
The last step matters because recompressing in any app can strip the DPI value again, as our test showed. If the form only states a KB limit and a ratio, ignore DPI and focus on pixels and file size. The guide to compressing a photo to 200 KB covers the most common limit.
Common DPI mistakes
- Raising DPI to "sharpen" a photo. The DPI value is a label. A photo without enough pixels still breaks up when printed large.
- Upscaling with resampling. The file gets bigger but no detail is added, and it often pushes the photo over an upload limit.
- Assuming 72 DPI means poor quality. A 4000 pixel photo labelled 72 DPI can still print sharply at 4 x 6 inches.
- Compressing again and again. Every JPEG save loses quality. Compress once from the original. If it is still too big, read file still too big after compressing.
- Mixing centimetres and inches. DPI is per inch. Convert centimetres by dividing by 2.54 first.
Every Dokurapi tool processes files in your browser without uploading them to a server, as explained in how browser tools work. Once the size is right, you can turn the image into a document with photo to PDF.
Frequently asked questions
What does DPI mean for an image?
How many pixels do I need for a 4 x 6 print at 300 DPI?
Is a 72 DPI image low quality?
Does increasing DPI make an image sharper?
How do I check the DPI of an image on Windows?
Do upload portals check DPI?
Do Dokurapi tools keep the DPI value?
What DPI is a 600 x 800 pixel photo printed at 3 x 4 cm?
Sources
- Dots per inch, Wikipedia
- JPEG File Interchange Format, Wikipedia
- CSS Values and Units Module Level 3, W3C
- Reduce the file size of a picture in Microsoft Office, Microsoft Support
- Crop, resize, or rotate an image in Preview on Mac, Apple Support
Need help?Result not quite right, or unsure about a form rule? Ask Dokurapi support on WhatsApp. Please do not send personal documents in chat.
Chat on WhatsApp