To scan an ID card without a scanner, take a sharp photo of the card with your phone in even light, crop it exactly to the card edges, then save it as a JPG or PDF that fits the upload limit of your form. No website can read a physical card remotely, so "scanning online" really means processing the photo in your browser. In the Dokurapi Photo to PDF tool, all of that happens on your own device.
This guide covers how to photograph an ID card so the text stays readable, how to crop and shrink the file, how to put the front and back into one PDF, and what to watch because an ID card holds personal data. The examples use an Indonesian e-KTP as the reference card, but the steps work for any credit card sized ID. Every file size below comes from our own test on 11 November 2026 with a sample card we drew ourselves, never a real ID.
What scanning an ID card online means
Scanning a card used to mean placing it on the glass of a flatbed scanner and saving the result as an image. Phone cameras are now sharp enough to do the same job. What separates a "scan" from an ordinary photo is three things: the background around the card is removed, the card looks flat and straight, and the file size is reasonable to send.
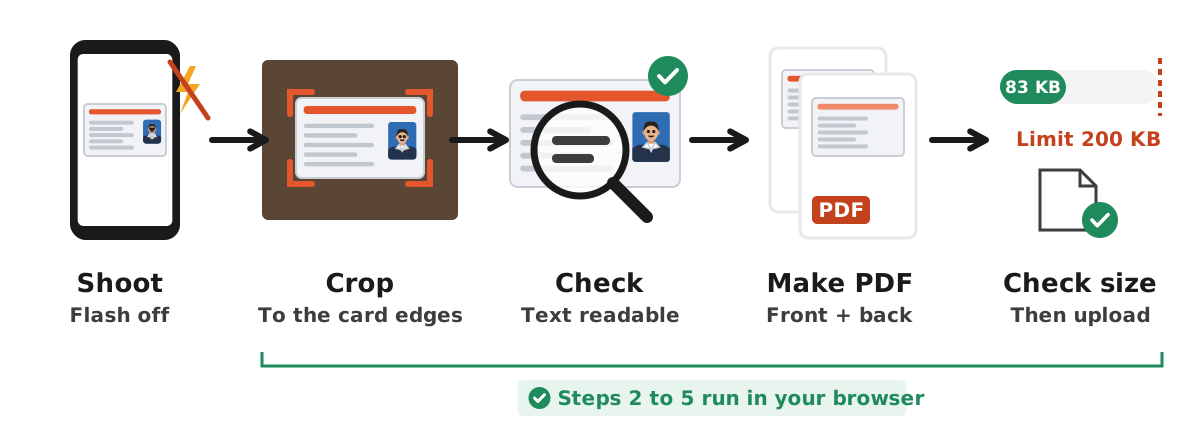
So in practice, scanning an ID card online is a short chain: shoot, crop, then save in the format the form asks for. Some apps do the whole chain automatically, such as the scan feature in the Google Drive app. According to Google Drive Help, scanning is available in the Drive app for Android and iOS, while the web version of Drive does not offer it. The result is saved as a PDF in your Drive account.
The second route is to shoot with the normal camera app and process the photo in a browser. This route suits forms where you need control over the file size, for example an upload capped at 200 KB or 500 KB. We covered the general technique for paper pages in our scan document to PDF guide; this article focuses on what is special about ID cards.
Ready to try it? The tool is free and runs in your browser.
Open the Photo to PDF toolHow to photograph an ID card so the text stays readable
The quality of the scan is decided almost entirely when you take the photo. Processing afterwards can only crop and shrink; it cannot bring back blurry letters. Follow this order:
- Place the card on a plain surface with strong contrast, such as a dark wooden desk or a sheet of black paper. Avoid patterned cloth.
- Find even light, for example near a window during the day. Turn the flash off, because the plastic layer of most ID cards reflects it and leaves white glare over the text.
- Hold the phone parallel to the card, directly above it. An angled shot turns the card into a trapezoid.
- Move closer until the card fills about 60 to 80 percent of the screen, then tap on the text so the focus lands there.
- Take two photos, front and back. Zoom in on the screen to check that the ID number and name are clearly readable.
If letters look streaked or shiny, move the card slightly away from the light source and shoot again. A retake costs a few seconds, while a glare-covered card is a common reason for verification staff to reject an upload. When the photo is sharp but the file is too big, move on to cropping.
Cropping the photo to the card edges
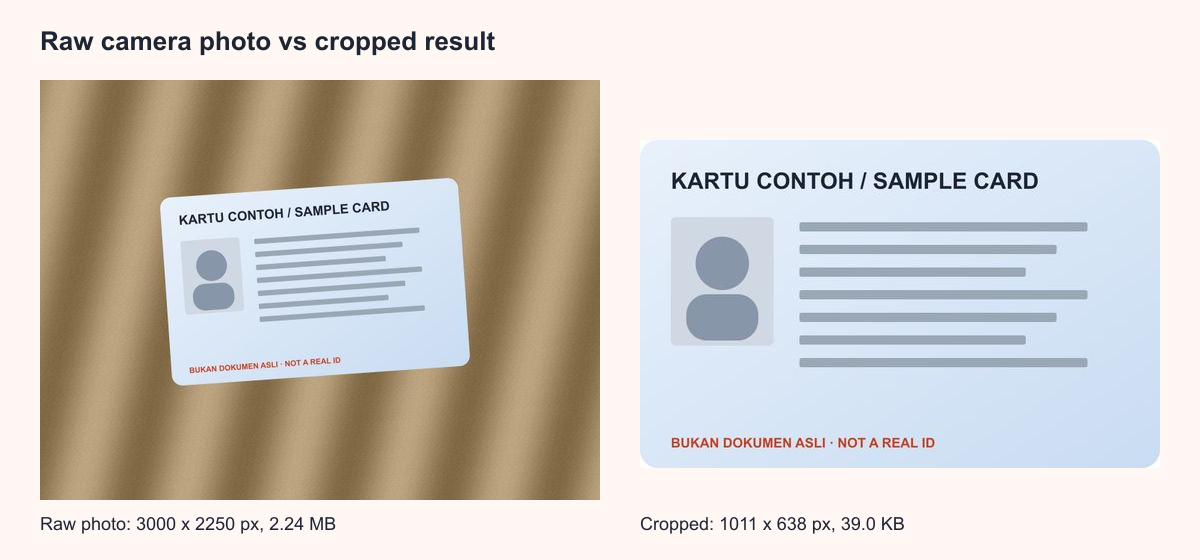
A raw camera photo is usually far larger than needed. In our test, a photo of the sample card on a desk measured 3000 x 2250 pixels and 2.24 MB. After cropping exactly to the card edges and saving as a 1011 x 638 pixel JPG, it dropped to 39.0 KB for the front and 42.7 KB for the back. The desk background made up most of the file size.
The 1011 x 638 pixel figure is not random. Many ID cards, including the Indonesian e-KTP, use the credit card format ID-1, which measures 85.60 x 53.98 mm in the ISO/IEC 7810 standard. The Indonesian identity card article states that the e-KTP follows that standard. At 300 dpi, that physical size equals 1011 x 638 pixels, sharp enough to print at real size. The link between pixels and dpi is explained in our image dpi guide.
To crop, use your gallery's built-in editor: choose crop, drag the four corners to the card edges, and save. If the card looks tilted, nudge the rotation slider before cropping. Full steps are in how to crop a photo.
Three ways to scan an ID card without a scanner
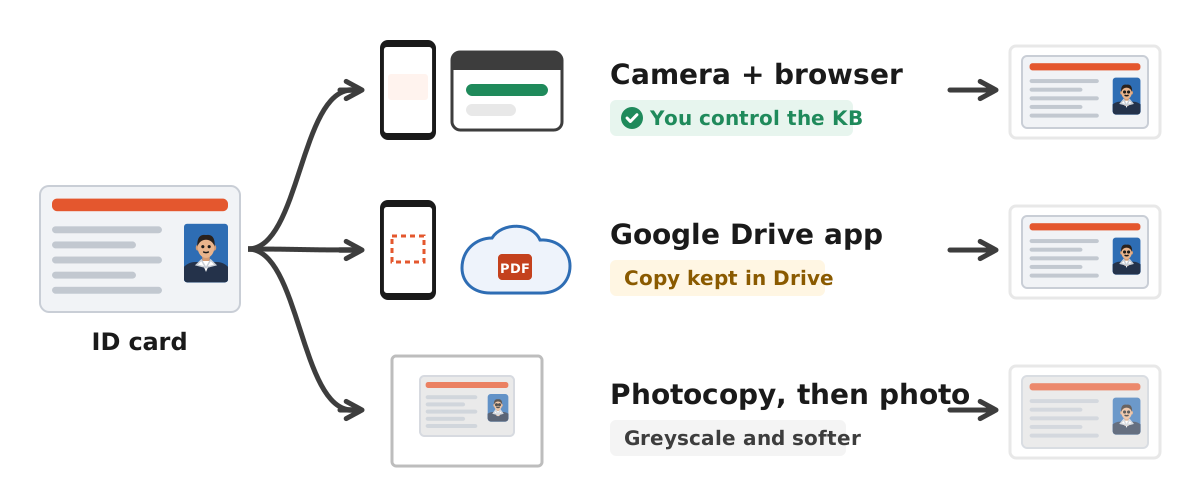
Not every task needs the same result. Online application forms usually want a small file in a set format, while a personal archive cares more about neatness. The table below sums up the three most common routes.
| Method | Short steps | Strength | Note |
|---|---|---|---|
| Phone camera, then a browser tool | Shoot, crop in the gallery, convert in Photo to PDF | You control the file size, no account needed | Cropping is manual |
| Google Drive app scan | Open the Drive app, choose scan, shoot the card | Edges cropped automatically, saved as PDF | The file is stored in your Drive account |
| Photocopy, then photo or scan | Photocopy the card, then photograph the sheet | Fits when an office asks for a printed copy | Greyscale and softer |
For forms with a size cap, the first route is the easiest to control because you know exactly what file comes out. The Google Drive route is convenient, but a copy of your ID ends up in cloud storage, so keep that account secure. Use the photocopy route only when it is required, because a photographed photocopy usually loses sharpness.
Putting the front and back into one PDF
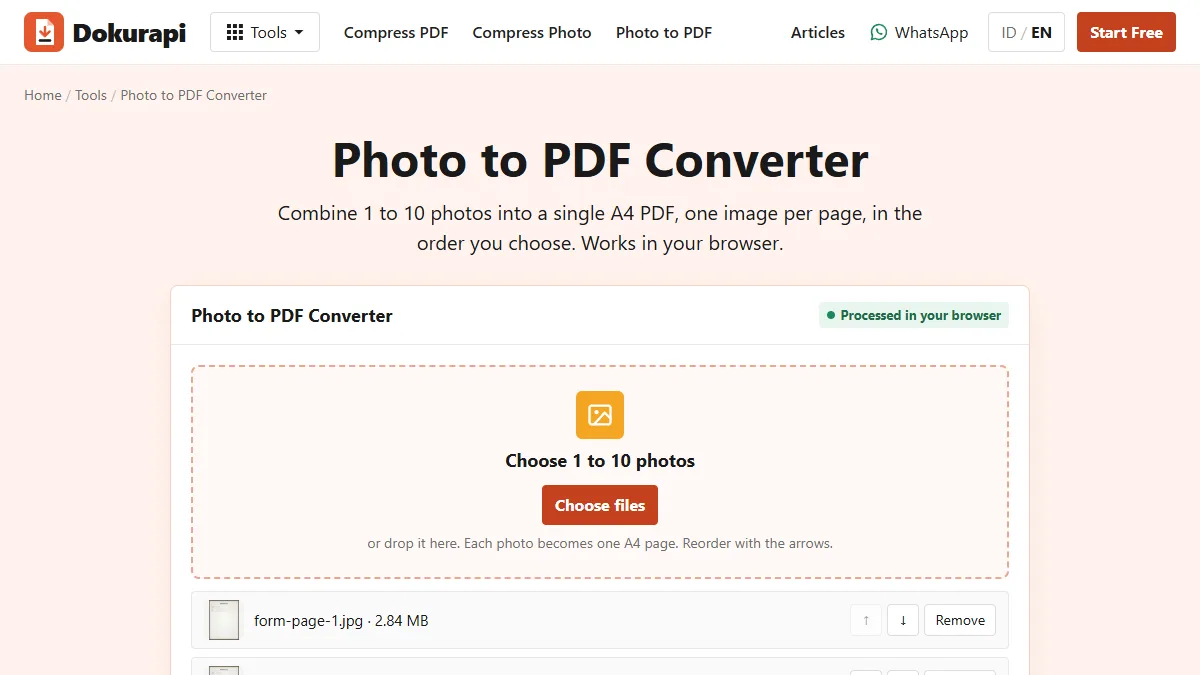
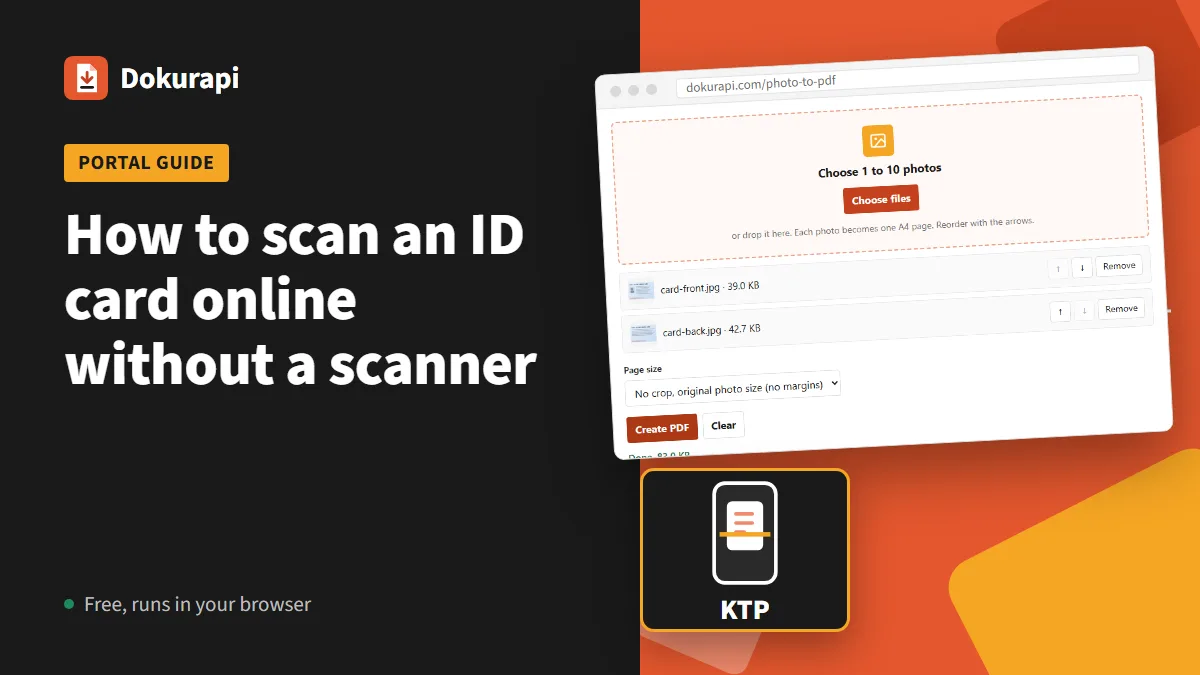
Many forms ask for the ID card as a PDF, sometimes including the back. With the Dokurapi Photo to PDF tool, the steps are:
- Open Photo to PDF in your phone or laptop browser.
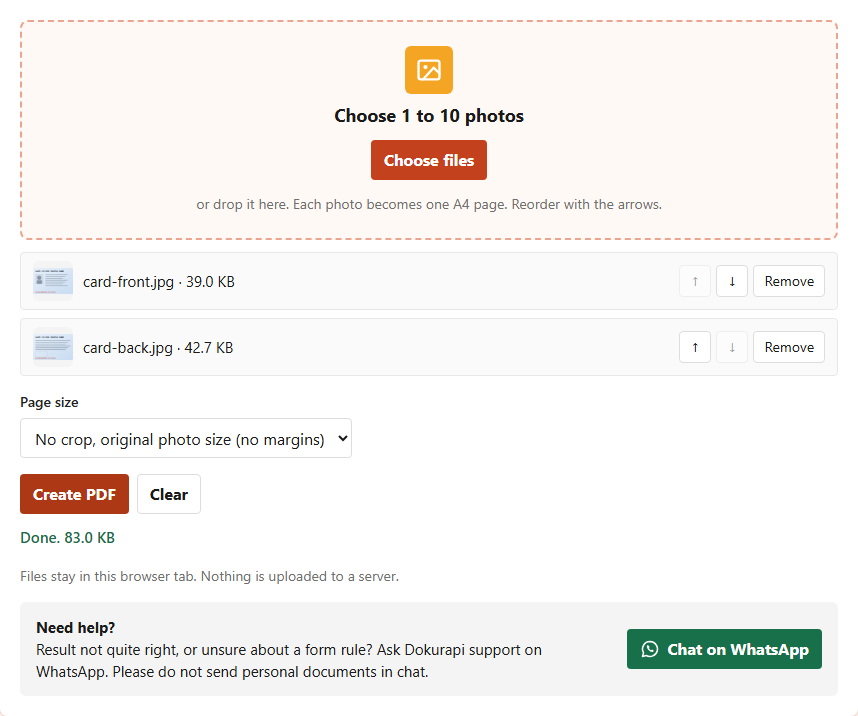
- Choose the two cropped photos, front first, then back. Reorder them with the arrow buttons if needed.
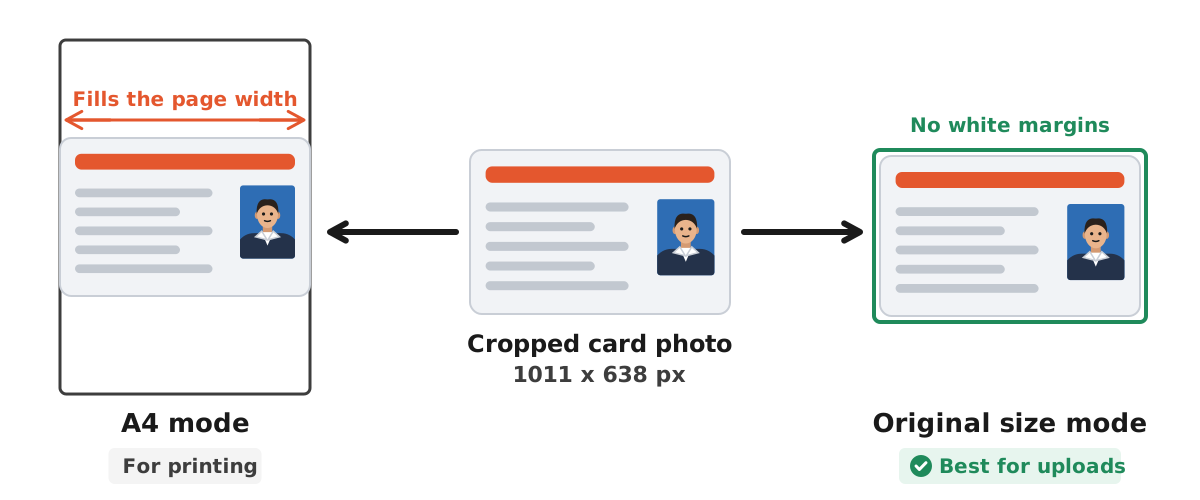
- Choose the page size. "A4 (photo centred)" suits files that will be printed, while "No crop, original photo size" makes each page exactly the size of the photo with no white margins.
- Press Create PDF. The file downloads straight away as dokurapi-foto.pdf.
In our test, two JPGs of 39.0 KB and 42.7 KB produced a two page PDF of 83.1 KB in A4 mode and 83.0 KB in original size mode. The total is close to the sum of the two photos because, according to the tool's code, JPG photos are placed in the PDF as they are, without recompression. So if the PDF is too big, shrink the photos first.
The tool makes one page per photo, so the result has two pages: front on page 1 and back on page 2. If a form wants both sides on a single page, this tool cannot lay that out yet. The remaining option is a printed copy that shows both sides, photographed as one sheet. To double check page order, see how to check PDF page order.
A4 or original size: which to pick
The page size option confuses many people, yet it changes the look a lot. In A4 mode, the Dokurapi tool enlarges the photo until it touches the page width and centres it. A card that is 8.5 cm wide in real life therefore appears almost as wide as an A4 sheet. The text stays sharp as long as the photo is sharp, but a printout will be much larger than the real card.
In original size mode, each PDF page is made the size of the photo, with no white border. This is the tidiest choice for uploads because the reviewer sees the card without empty space. If an office asks for the card printed at real size on A4, it is safer to print from a document app where you can set the image size in centimetres, or simply use a photocopy.
For most online forms, original size mode is enough. Pick A4 only when the form instructions mention a paper size, or when the file will be merged with other A4 documents such as a cover letter. You can join several PDFs in the Merge PDF tool, with a sample file order in the merge PDF for submissions guide.
Matching the file size to the form limit
Every portal sets its own upload limit, and limits can change each year. Always read the official notice of the portal you are using. If the file is still too large, you have two options:
- Shrink the JPG before turning it into a PDF with compress image to 200 KB. This works best because a PDF from the Dokurapi tool follows the size of the photos inside it.
- Shrink the finished PDF with compress PDF to 200 KB, then confirm the result with check PDF size.
Dokurapi compressors apply a 6 percent safety margin, so a 200 KB target is pushed to about 188 KB. The margin keeps the file under the limit even when a portal counts 1 KB as 1024 bytes. The KB and MB difference is covered in 200 KB to MB, and what to do when a compressed file is still too big is in compressed file still too big.
Do not push quality too low. On an ID card, the ID number and date of birth must stay readable. After shrinking, open the result and zoom in. If digits start to break up, raise the size target or crop closer to the card.
Protecting personal data when you scan an ID card
An ID card shows your ID number, name, address, date of birth, and face. In Indonesia, data like this is personal data covered by Law Number 27 of 2022 on Personal Data Protection, and most countries have similar rules. A few simple habits keep copies of your card safer:
- Send an ID scan only to official forms or offices that actually ask for it.
- Avoid file tools that upload your card to a server. Dokurapi tools process files inside the browser tab; see how browser tools work.
- Delete the ID photos from your gallery and downloads folder when you are done, including the trash folder.
- Do not share ID photos in group chats or with people you do not know.
Some people write a note such as "for X application only" across a copy of their ID. This can reduce the risk of the copy being reused elsewhere, but first make sure the receiving portal accepts a marked copy. Dokurapi does not currently have a tool for adding that kind of note.
Checklist before you upload an ID card scan
Before pressing upload, go through these points one by one:
- All text is readable, especially the ID number, name, and date of birth.
- The whole card is visible, all four corners are inside the frame, and no fingers cover it.
- There is no glare over the text or the face photo.
- The format matches the request, JPG or PDF.
- The file size is under the form limit, checked with how to check file size before upload.
- If both sides are required, the order is front then back.
Once everything matches, upload the file and keep the confirmation. If the portal rejects the file, read the error message: the usual causes are a file that is too big, the wrong format, or a file name with special characters.
Frequently asked questions
How do I scan an ID card without a scanner?
Can a website scan my ID card directly?
What resolution is enough for an ID card scan?
How do I put the front and back of an ID card in one PDF?
Why is my ID card PDF so large?
Is it safe to scan an ID card with Dokurapi?
Can I scan an ID card with Google Drive?
Should I write a note on my ID card scan?
Sources
- Scan documents with Google Drive, Google Drive Help
- ISO/IEC 7810, Wikipedia
- Indonesian identity card, Wikipedia
- Law No. 27 of 2022 on Personal Data Protection, peraturan.go.id
Need help?Result not quite right, or unsure about a form rule? Ask Dokurapi support on WhatsApp. Please do not send personal documents in chat.
Chat on WhatsApp