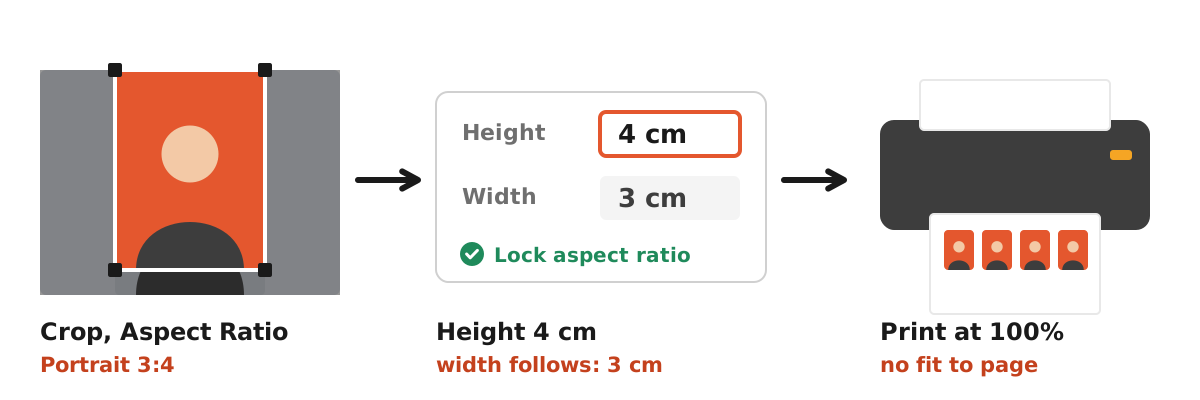
Here is how to make a 3x4 photo in Word: insert the photo, select it, open Picture Format, click the arrow under Crop, choose Aspect Ratio and pick the 3:4 portrait shape. Move the photo inside the frame so the face is centred, press Esc, then type 4 cm in the Height box. With the aspect ratio locked, Word sets the width to 3 cm by itself. Copy the photo as many times as you need, and print at 100 percent scale, not fit to page. On an A4 page with Narrow margins, 30 photos of 3 x 4 cm fit with 3 mm cutting gaps.
This guide walks through each step with Microsoft's own instructions, explains how to make Word show centimetres, gives the number of photos per A4 sheet for different margins, and covers the print settings that most often turn a 3 x 4 cm photo into something slightly bigger or smaller. If you only need the size in pixels for an upload, our article on the 3x4 photo size in cm, mm and pixels covers that.
Prepare the photo before it goes into Word
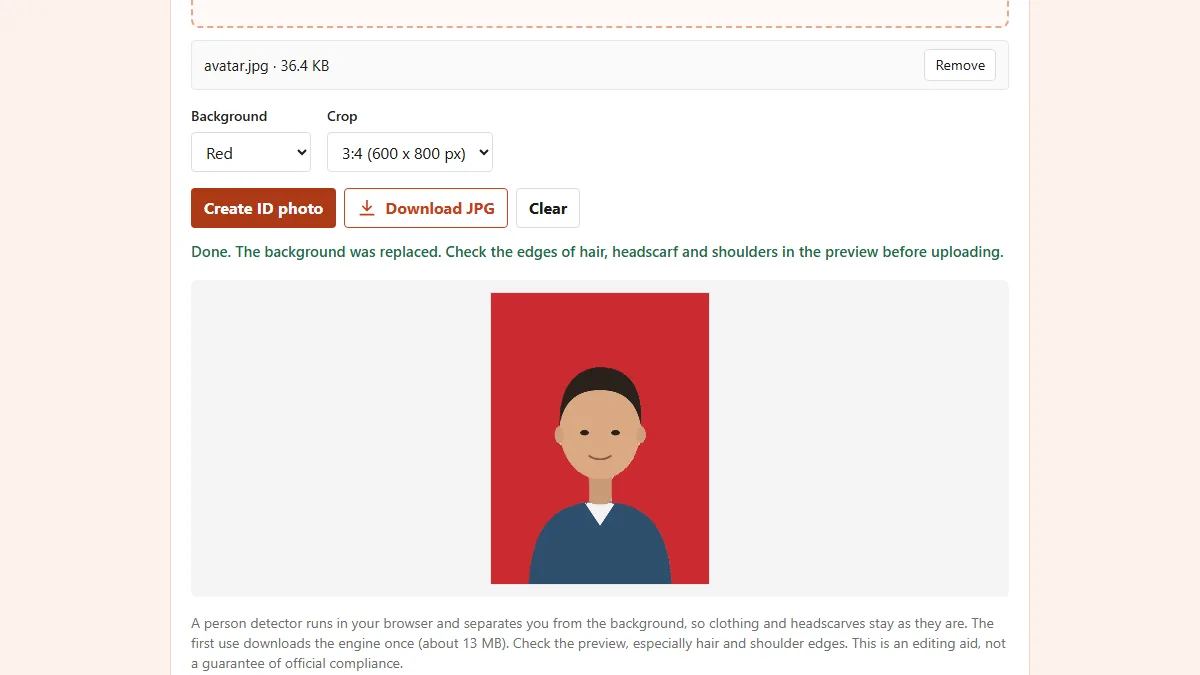
Word can crop and resize, but it cannot fix a photo with a messy background or the wrong colour. If the institution asks for a red or blue background, do that first. Our free ID photo tool replaces the background in your browser and can crop to 3:4 at the same time, giving a 600 x 800 pixel JPG. The red background guide and the blue background guide explain which institutions usually ask for which colour.
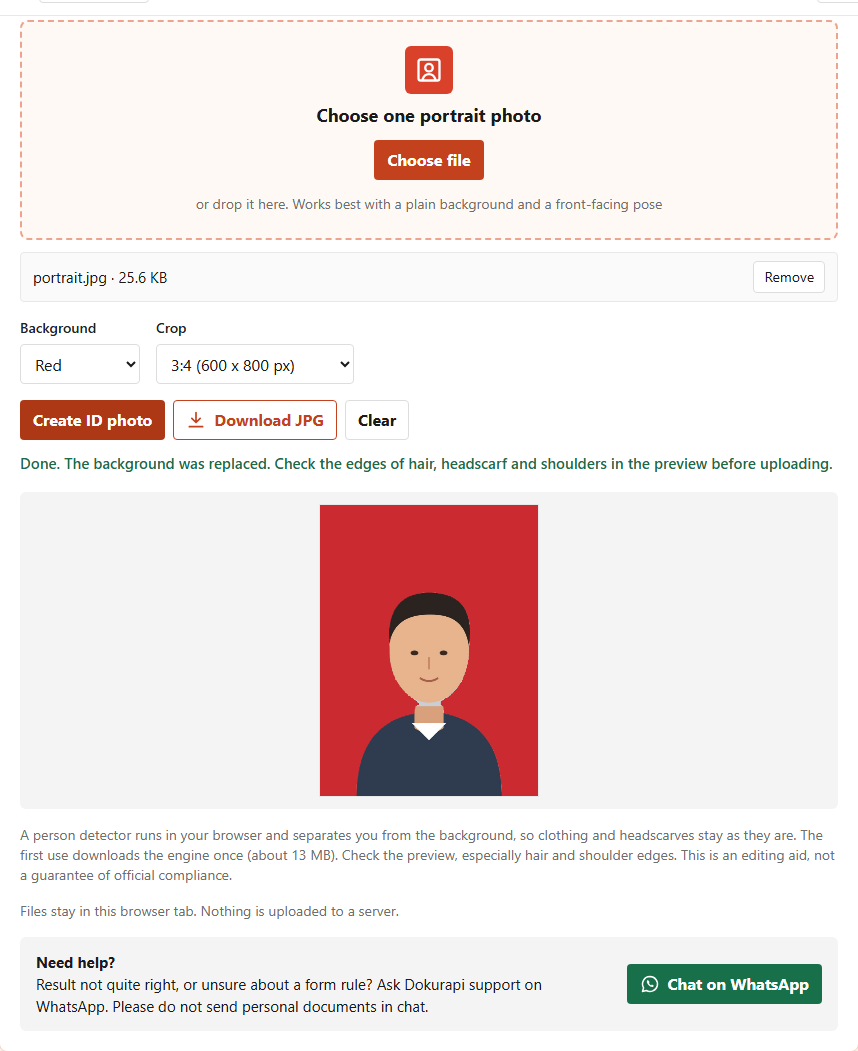
Resolution matters less than people think. A 600 x 800 pixel photo printed at 3 x 4 cm works out to about 508 pixels per inch, well above what a photo printer needs. A small photo taken from a chat app may be too soft, though. If you only have a low-resolution image, our guide to image DPI explains how to tell whether it will print sharply. Keep the original photo file as well, in case you need to crop it again.
Ready to try it? The tool is free and runs in your browser.
Open the ID photo toolStep 1: crop the photo to a 3:4 shape in Word
The crop decides the shape, the size box decides how big it prints. Doing the crop first means the face stays in proportion when you resize. Microsoft's support page describes the Aspect Ratio crop, which works the same in Word, PowerPoint and Excel in Microsoft 365.
- Choose Insert, then Pictures, and add the photo to a blank document.
- Select the photo, then open the Picture Format tab.
- In the Size group, click the arrow under Crop.
- Choose Aspect Ratio, then the 3:4 option in the Portrait group.
- Drag the photo inside the crop frame so the face sits in the middle, with a little space above the hair.
- Press Esc or click outside the photo to finish.
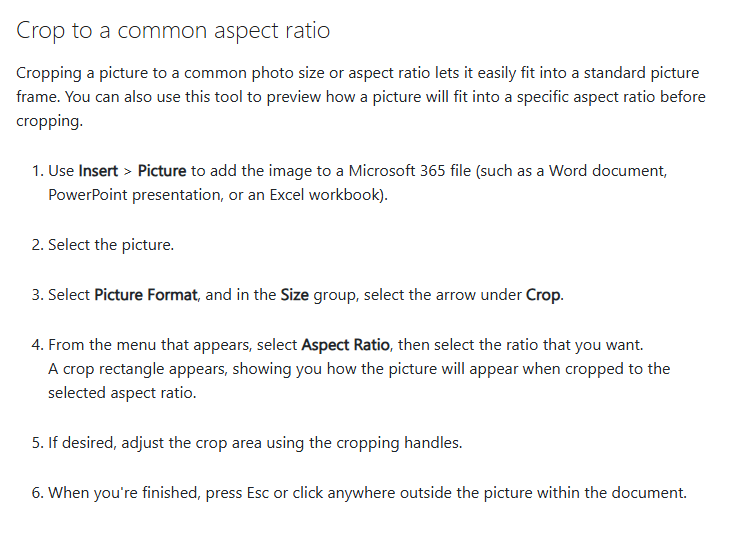
If your version of Word has no Aspect Ratio option, crop by hand with the black handles and aim for a shape that is a little taller than it is wide. Then use the size boxes in step 2 with the aspect ratio unlocked, type 3 cm and 4 cm, and look closely: if the face looks stretched, the crop was not 3:4, so undo and crop again. Microsoft also notes that cropped areas stay hidden inside the file. To remove them, use Compress Pictures and keep "Delete cropped areas of pictures" ticked, which also makes the document smaller.
Step 2: set the height to 4 cm
Once the photo has a 3:4 shape, only one number is needed. Select the photo and look at the Height and Width boxes on the Picture Format tab. Microsoft's guide explains that you enter new measurements there, and that when the two boxes refuse to change independently, the Lock aspect ratio option is switched on. For an ID photo that is exactly what you want: type 4 cm in Height and press Enter, and Word sets Width to 3 cm.
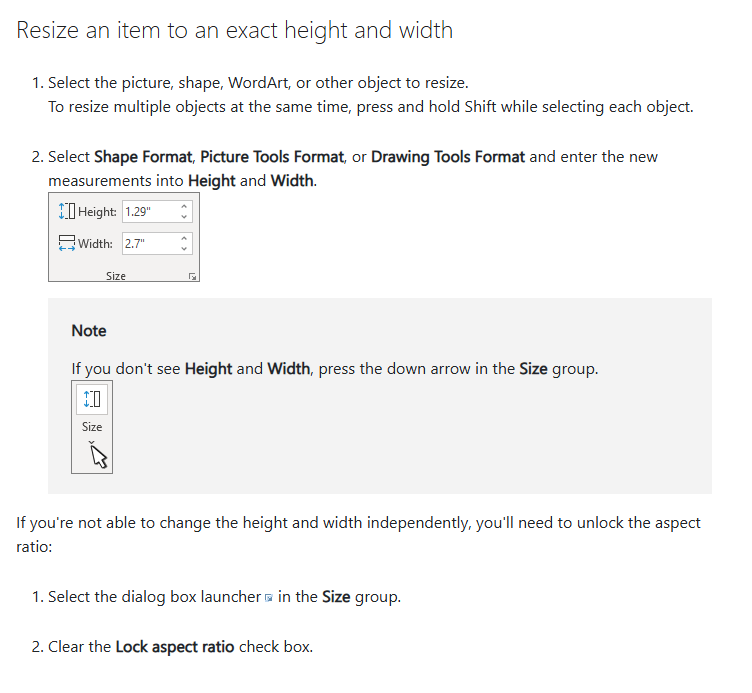
The example in Microsoft's screenshot shows inches. If your Word shows inches too, you have two options. You can type the unit with the number, for example 4 cm, and Word converts it. Or you can change the unit for good under File, Options, Advanced, in the Display section, where "Show measurements in units of" can be set to Centimeters. After that, the boxes read 4 cm and 3 cm directly, which makes checking much easier.
Look at both numbers before moving on. Width should read 3 cm. If it reads 2.9 cm or 3.1 cm, the crop was slightly off the 3:4 shape. Redo the crop with the Aspect Ratio option rather than unlocking the ratio and forcing the width, which would squash the face.
Step 3: fit many 3x4 photos on one A4 page
Institutions usually ask for several printed copies, so fill a sheet instead of printing one photo per page. The easiest layout uses pictures placed in line with text, which Word treats like large characters. Select the photo, choose Layout Options, pick In Line with Text, then copy it and paste it repeatedly with a space between each copy. Word wraps the photos onto the next line by itself. For more precise gaps, insert a table with as many columns as photos per row and put one photo in each cell.
How many photos fit depends on the page margins. A4 paper is 21 x 29.7 cm. Word's Normal margins are 2.54 cm on every side, leaving 15.92 x 24.62 cm for content; Narrow margins are 1.27 cm, leaving 18.46 x 27.16 cm. Our calculation below assumes a 3 mm gap between photos for cutting, or no gap at all.
| Word margins | Usable area on A4 | Photos with no gap | Photos with 3 mm gaps |
|---|---|---|---|
| Normal, 2.54 cm | 15.92 x 24.62 cm | 30 (5 x 6) | 20 (4 x 5) |
| Narrow, 1.27 cm | 18.46 x 27.16 cm | 36 (6 x 6) | 30 (5 x 6) |
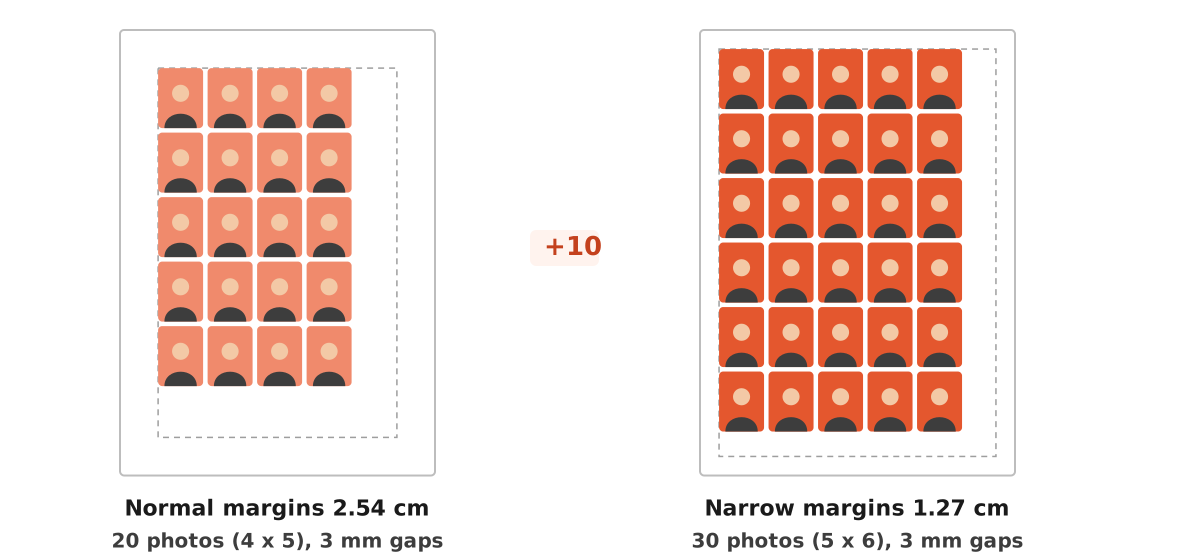
To change margins, open the Layout tab, click Margins, and choose Narrow. Many home printers cannot print right to the edge of the paper, so very small custom margins may cut off the outer row. If you need the photos on photo paper, a 4R sheet of 102 x 152 mm holds 9 photos of 3 x 4 cm in a 3 x 3 grid, as our 3x4 size guide shows, and the same Word steps work after you set a custom paper size.
Print at true size and check with a ruler
The most common reason a carefully sized photo comes out wrong is the print dialog, not Word. Many printer drivers offer options such as fit to page or scale to paper size. These enlarge or shrink everything to fill the paper, so a photo set to 3 x 4 cm might print at 3.2 x 4.3 cm. Choose actual size, 100 percent, or no scaling, depending on how your printer names it.
- Print one test sheet on plain paper.
- Measure one photo with a ruler: it should be 30 mm wide and 40 mm tall.
- If it is off, check the scale setting and the paper size (A4 versus Letter) in the print dialog.
- Only then print on photo paper.
If you plan to print at a shop, save the document as a PDF with File, Save As, PDF, so the layout cannot shift on another computer, and ask the shop to print at 100 percent. Word can also reduce picture quality when it saves. For printing, File, Options, Advanced has an Image Size and Quality section where you can choose not to compress images in the file. To attach the photo inside a PDF for an online form, our guide to adding an image to a PDF explains the simpler route.
When the form wants a file, not a print
Many applications now ask for an uploaded photo rather than a printed one. In that case Word is not needed at all, and putting the photo in a document can even hurt, because the portal expects a JPG with a specific pixel size and file size. Use the original 3:4 JPG instead. If the limit is 100 KB, the Compress Image to 100 KB tool reduces it in your browser, and our guide to compressing a photo to 100 KB explains why some photos resist.
For job applications, the photo rules differ from school and government forms, and our article on the photo for a job application covers them. For other sizes, see the guides to the 4x6 photo size and the 2x3 photo size, and if you need a different shape, how to crop a photo explains aspect ratios in more depth.
One more thing people miss: a Word document with a photo in it is not a photo file. If a portal asks for an ID photo and you upload a .docx or a PDF containing the photo, the system may reject the format, or the reviewer has to open a document just to see your face. Keep two versions apart: the 3:4 JPG for uploading, and the Word document with a full page of photos for printing. Name them clearly, for example idphoto-3x4-red.jpg and idphoto-3x4-print-A4.docx, so they do not get mixed up when a deadline is close.
Common mistakes when making a 3x4 photo in Word
- Resizing before cropping. Without a 3:4 crop, typing 3 cm and 4 cm stretches the face.
- Unlocking the aspect ratio to force a number. If the width will not land on 3 cm, the crop is off; fix the crop instead.
- Reading inches as centimetres. Type the unit, or switch Word to centimetres in Options.
- Printing with fit to page. Use 100 percent or actual size, and check with a ruler.
- Margins too small for the printer. The outer row may be cut off; Narrow at 1.27 cm is a safe choice.
- Using a chat-app photo. Compressed images can look soft at 3 x 4 cm; start from the original.
Frequently asked questions
How do I make a 3x4 photo in Word?
Why does Word show inches instead of centimetres?
How many 3x4 photos fit on an A4 page in Word?
Why is my printed photo not exactly 3 x 4 cm?
Why does the face look stretched after resizing?
Can I change the background colour of the photo in Word?
What pixel size should the photo have?
Do I need Word if the form asks for an uploaded photo?
Sources
- Crop a picture in Office (Microsoft Support)
- Change the size of a picture, shape, text box, or WordArt in Word (Microsoft Support)
Need help?Result not quite right, or unsure about a form rule? Ask Dokurapi support on WhatsApp. Please do not send personal documents in chat.
Chat on WhatsApp